

Sonas is a communication tool, helping you stay in touch with your customers. Keeping all messages in one place for easy reference.
As part of the venue set up process, you set up your Sonas specific email address and an email address using your own domain. See Default Sonas Email. Once your outgoing and incoming email addresses are setup, you are ready to send and receive messages. This article will show you how to send transactional emails to your customers.
If you cannot see this section or get permission denied messages with any of the actions, please contact your Company Admin in order to get the required permissions.
A Few Points on Emails
Here are a few things to keep in mind when sending email in Sonas.
- When a customer sends an email, Sonas recognizes the sender's email address to link received emails with enquiries or events. If not recognized, you can link or create a new enquiry. See How to Use your Email Inbox.
- Emails will be received by the recipient in their email inbox, only if their email is enabled, see Enable or Disable email. Otherwise, messages are accessible in the customer planning portal only.
- Everyone with enabled email in the Event's People Section will receive the email and everyone with access to the portal will see all messages there as well.
- Any emails that are not to be viewed by all people listed in the People Section, should be handled outside of Sonas. Such as when a bride is planning a surprise for the groom.
- When you reply to a message, the reply will go to everyone in the People section with enabled email and/or portal access.
- There is no CC.
- There is no BCC.
- There is no emailing a contact not listed in the People Section.
- Email is designed for customer communication only.
- Emails sent directly to a customer as a response to their enquiry or as part of the planning process are called transactional emails.
- Emails sent with unrelated marketing information are called marketing emails.
- Emails manually linked to an event, do not automatically add that sender to the people section, you must add them if you want the sender to receive a reply and/or future emails. How to Add a Customer to the People Section
How to Send an Email (Send Emails)
- Navigate to the Event's Message section. Event > Messages
- Click on +New Message in the upper right hand corner.
- If you want to apply a Custom Email template, do so now, or skip to the next step.
- Actions > Use Template
- Select the template of choice from the drop down list, or type in a few letters to search, and then click the template.
- Click Select.
- Confirm you want to apply the template (this will override anything you have already written), click OK.
- If you are not using a template, be sure to fill out the Subject, Category (the email category) and the message Content. You can also select which footer you want to use.
- There is a tool bar to enable you to customise the email, change font, text size and colour, alignment, and more.
- Any changes will be saved and if you leave your email before sending, it will be saved in the event's draft folder.
- When you are ready to send, hit the Send button in the upper right hand corner.
How to Add an Attachment (Add Attachments to Email)
When composing an email, you can attach from your Venue's documents (pre-approved attachments) or upload from your desktop. Please note that attachments cannot exceed 5MB.
To attach a Venue Document:
- When composing an email, click on the paperclip icon on the tool bar. This icon will only appear if there are Venue Documents available.

- Select the document you want to attach.
- Scroll to the bottom and see your attachment listed in green. If it is red, that means there is an issue.
To attach a document uploaded from your desktop:
- When composing an email, click on the sheet of paper icon on the tool bar.

- Either drag and drop your file, or browse to find and select it.
- Scroll to the bottom and see your attachment listed in green. If it is red, that means there is an issue.
How to Edit and Send a Draft Email (Draft Email)
Emails that are not sent immediately, are saved as a draft. You can access the drafts to edit, send and/or delete. You will only be able to see your drafts, not the drafts of colleagues.
- Navigate to the Draft folder of the event, Messages > Drafts.
- Click on the draft you want to edit or delete.
- Click the red delete icon to permanently delete it. There will be a pop up to confirm you want to permanently delete the draft message.
- To edit, click the green edit icon. This will return the message to the editor, allowing you to write, edit, attach, etc.
- Click save draft to return to draft status or click send.
How to Resend a Sent Message (Resend)
Occasionally you will need to resend a message.
- Navigate to the Sent folder of the event. Messages > Sent
- Click on the message you want to resend.
- Click on the blue Resend Email button.
- The message will be resent.
How to Reply to a Sent Message (Reply to a Sent Email)
In other cases you may want to resend a message, but include a message, such as a friendly reminder. In this case you will reply to a send email.
- Navigate to the Sent folder of the event. Messages > Sent
- Click on the message you want to reply to.
- The message will appear, where you can add in a message. Edit as you need to.
- Click Send when ready.
How to Reply to a Received Email (Reply to Email)
When you receive an email, you open it either from the Inbox or from the event Messages section. You can then reply to that message, keeping the email thread in tact.
- Open the message you want to reply to.
- Click the reply button in the upper right hand corner.

- The editor will open, allowing you to type your reply. You can also scroll down and add text inline.
- If you apply a template here, you will LOSE the email thread, including the "Re:" in the subject.
- Send when ready. The message is sent to those enabled in the People Section, if the original sender is not on this list, they will not receive the reply.
About Message Status Icons (Message Icons)
There are a few ways of getting alerts to the failure of sending messages. "Message Not Sent" activities will be listed in the Event Activity and the main Activity list. You can also add it to the activities that require verification or trigger a notification, Venue > General > Activity Settings.
In the Event's message center there are a series of icons to know more about the messages sent and received. Here they are and what they mean:
| Icon | Meaning |
 | Message has been sent. |
 | Sent message has been opened. |
 | Sent message has an attachment. |
 | There was an error, check event activity log for more information. |
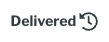 | Sent message has been delivered. |
 | Sent message, deliverability unknown, check the event activity log for more information. |
How to Resend Emails (Resend Email)
Sometimes you will need to resend an email. Maybe a customer deleted by accident, or you need to resend as a reminder. For whatever reason, you can resend messages with ease.
- Navigate to to the sent message you want to resend from the Event's Message section, under Sent.
- Open the message.
- Click Resend Email.

- Confirm after reading the pop up confirmation message.
Related Articles
How to Add a Customer to the People Section