

Each Enquiry and Event in Sonas has a subsection to manage People. Event > People The People section allows you to identify all individuals that are directly part of the planning of the event. This would likely include the couple, maybe the person financially responsible for the event, or even an outside event planner. Sonas uses the email address of individuals in the People section to associate incoming messages to events.  Visiting the People section gives you a snapshot of who the Main Customer is, who has access to the customer portal, and who is receiving emails. Icons easily identify the status of each person.
Upon opening the People section there will be a list of people for the event (this is not the guest list). In this example, there are there people listed, not they all have different statuses.
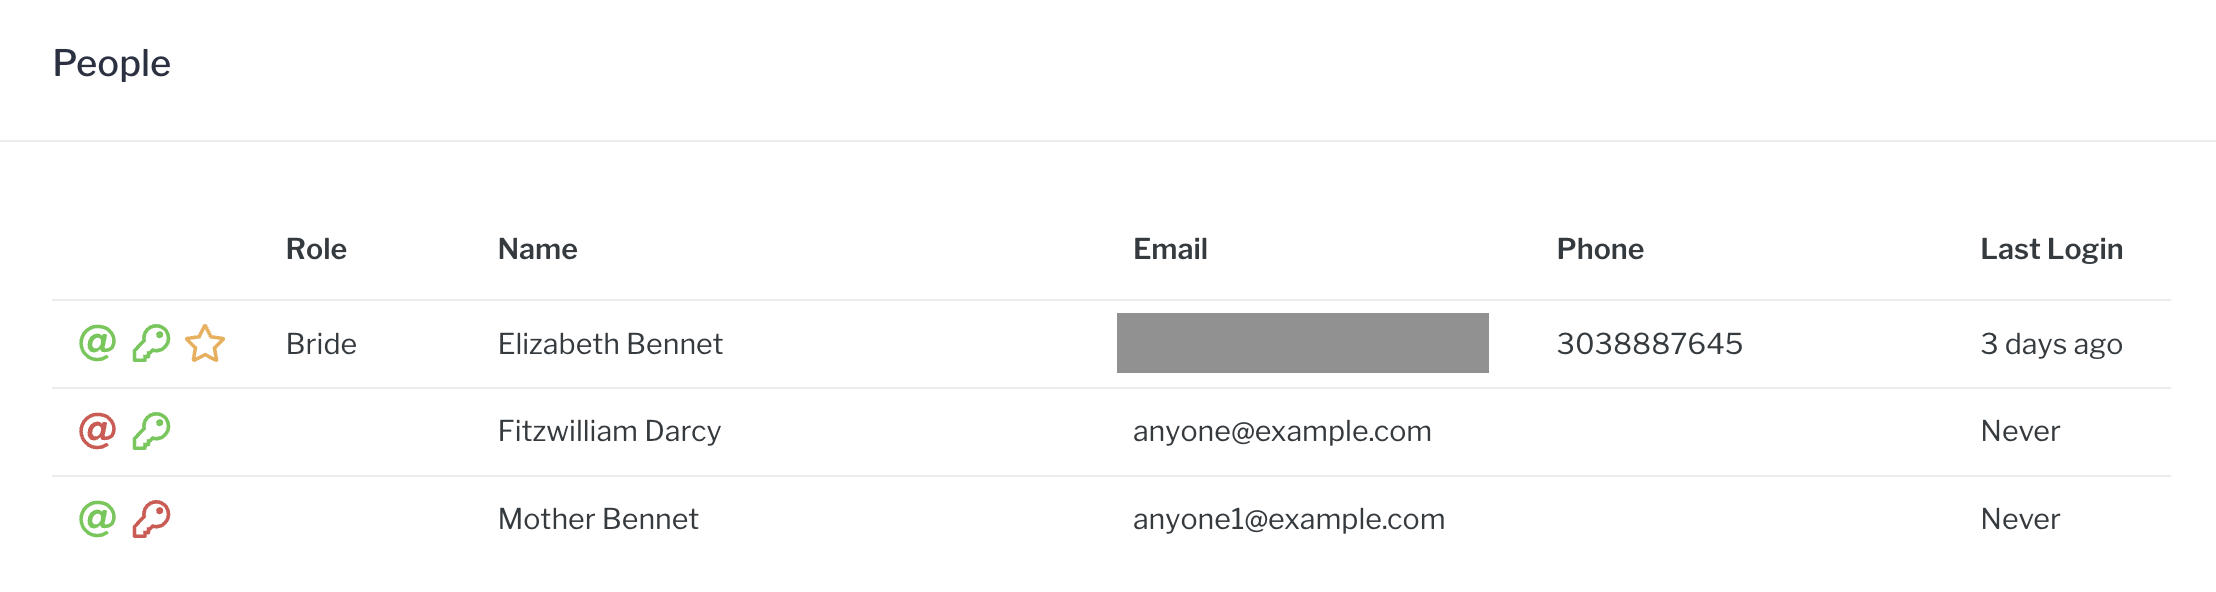
There are icons to the left of the name to give you some insight into the individual.
 The @ is the icon for who receives emails. When the @ is Green, they are receiving emails. When it is Red they are not. You turn on and off email by clicking on the individual's name and clicking Actions to either disable or enable email settings.
The key icon signifies whether or not the individual has access to the Sonas Customer Portal. A Green key means they do have access, Red means they do not.
The star icon is used to signify which individual is the Main customer. Each event requires a main customer as the invoices are generated against the main customer.
Additional information provided on the People section landing page is the Role, Name, Email, Phone and their last login to the Sonas Customer Portal.
We will see how to edit individuals further down, first let’s see how to add new people.
How to add new people (Add New People)
Event > People
Actions > + Add Customer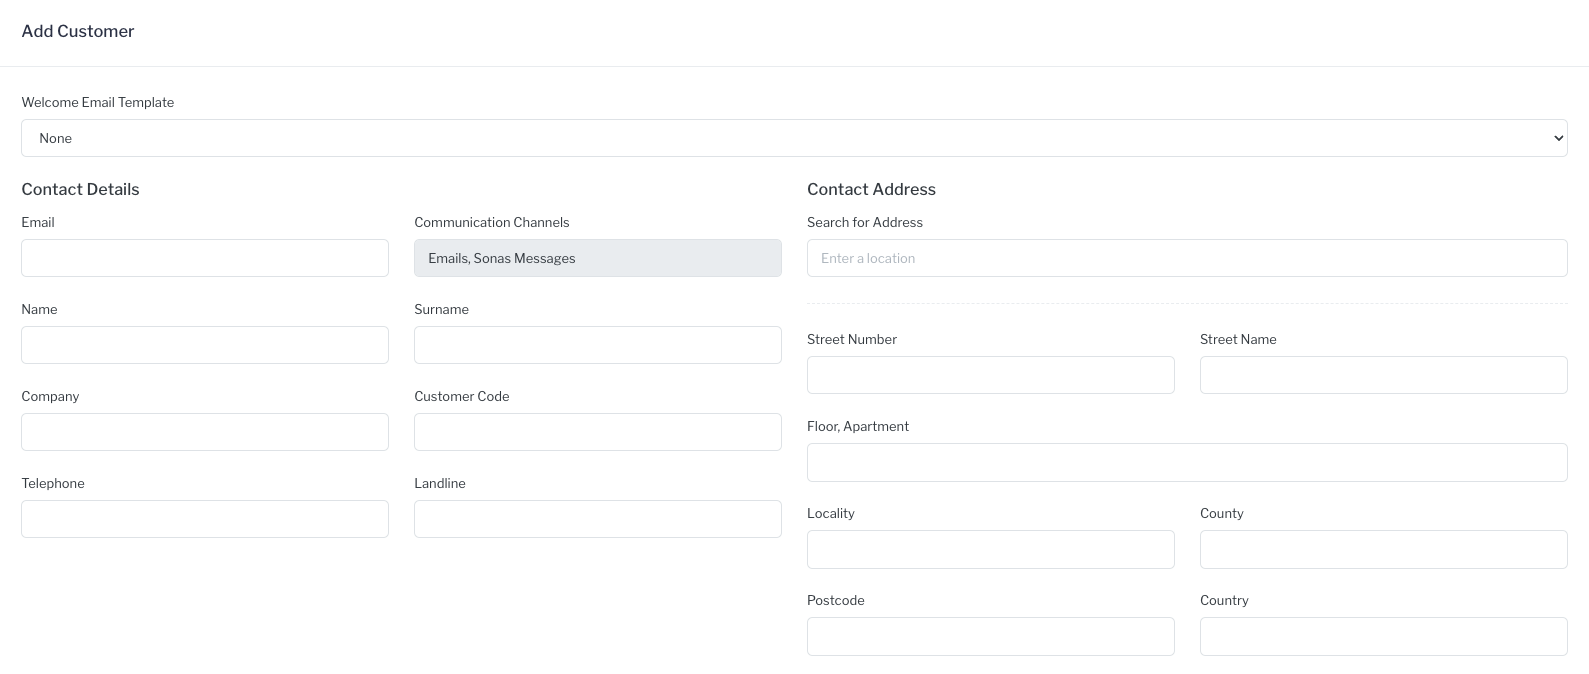 Fill in the fields. Including selecting the Welcome email you would like the individual to receive (if any), this could be your welcome to Sonas email with login instructions. Selecting an email gives access to the customer portal. If left with "None" they will not be given access at this time, you can add access at a later time, see How to add access below.
As mentioned above, the Main customer must receive emails, access to the portal is optional. Everyone will receive messages with their portal access, they will only receive email as well if Send Emails is Yes. The only way someone will not receive messages and/or emails is if BOTH emails and access is off. Be sure that the email address is correct.
The Customer Code is useful for repeat customers, tracking companies or for using an external ID, you fill in the code as it is not auto generated. The code is included in the Financial Record Export.
Please review that all the information is correct before clicking Save.
How to edit individual information
You can edit basic information by clicking on the individual's name on the People section landing page. Here is how to edit some other elements:
How to set someone as the Main customer (Set Main Customer)
- Click on the individual's name that you want to set at the Main customer.
- Actions > Set as Main Customer
- A pop up will appear to confirm that you want this individual to be the Main customer as invoices will be generated against this person, click OK.
- If the individual did not have Send Emails, it will automatically change to Yes as the main customer must receive emails.
- Click Save.
- You will see the star now next to this individual on the main People page.
How enable or disable email (Enable or Disable email)
- Click on the individual's name that you want to set at the Main customer.
- Actions > Enable Email Sending or Actions > Disable Email Sending
- Click Save.
- You will see the @ sign next to their name either red (disabled) or green (enabled), aligning with the changes you just made.
How to add access (Give Access)
- Click on the individual's name that you want to add access for.
- Actions > Give Access
- Click Save
- Select the welcome email you want sent. This email will provide login instructions.
- Click Give Access to Save.
- A pop up will appear to confirm that you in fact want to give access, click OK.
- You will be redirected to the People Section main page and you will see the key icon is now Green, indicating access.
How to remove access (Revoke Access)
- Click on the individual's name that you want to remove access for.
- Actions > Revoke Customer Access
- There will be a pop up to confirm that you want to remove access, click OK.
- Click save, you will see the key icon is now Green, indicating access.
How to Resend the email with access login instructions (Resend Login Email)
- Click on the individual's name that you want to resend the welcome to Sonas email to.
- Actions > Resend Email
- Select the welcome email you want sent. This email will provide login instructions.
- Click Resend, you will be redirected back to the main People page.
How to edit email address (Edit Email)
The email is designed not to be editable. However, if you need to change the email:
- Add the individual again (see How to add new people above) with the correct email.
- If the entry you're changing is the Main customer then set this new entry as the Main customer now (see How to set main customer above).
- Remove the entry with the incorrect email address (see How to remove an individual below).
How to remove an individual (Remove a Customer)
- Click on the individual’s name that you want to remove.
- Actions > Remove Customer