

Once you have your email templates in place (see Templates), you can schedule automatic emails using different template types.
If you cannot see this section or get permission denied messages with any of the actions, please contact your Company Admin in order to get the required permissions.
Automatic emails can be scheduled around four dates: Appointment Start Date, Payment Due Date, Event Date, Tasting Start Date, and Transaction Verified Date. You can add as many or as few automated emails per date as needed.
The date you base an automatic email on, determines which template type is available for you to use.
| Date being used for scheduling email | Template Type used |
| Appointment Start Date | Appointment Reminder |
| Payment Due Date | Payment Reminder |
| Event Date | Event Reminder |
| Tasting Start Date | Tasting Reminder |
| Transaction Verified Date (Verified Payment) | Transaction Verified |
Each scheduled email can be set to send before or after the date, using days, weeks, months or years. (With exception for the Transaction Verified Date, which is set to be sent immediately upon transaction verification.)
There are also other settings to ensure the messages are sent at the right time and to the correct customer, filtered by event type and appointment type. This article will show you how to set up and manage automatic emails.
How to configure an automated email
- Navigate to Automatic Emails, Venue > Automatic Emails.
- Click on Actions and select +New Automatic Email
- Select the various configurations of your automatic email.
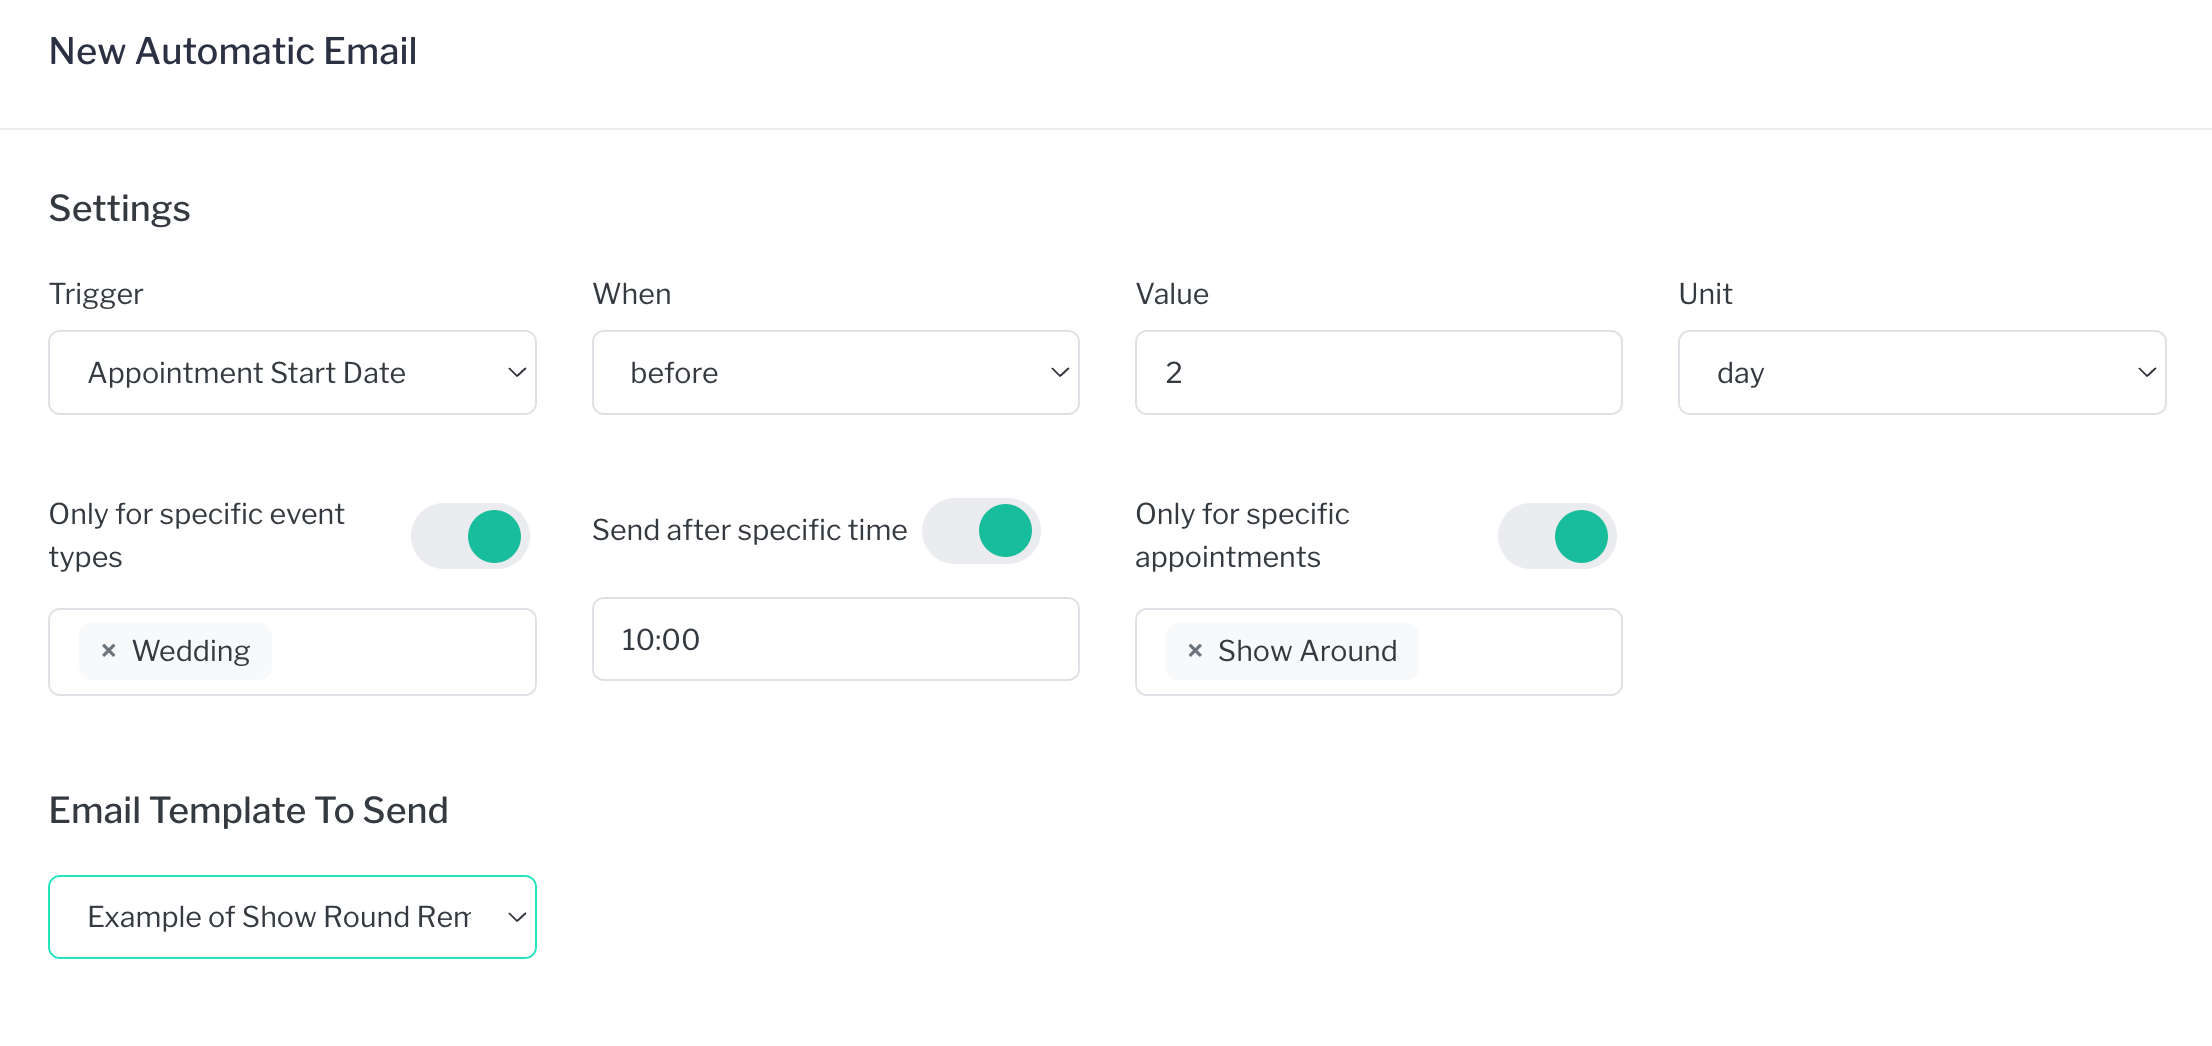
- Trigger, the date that the email will be scheduled against- Appointment Start Date (viewings, meetings and item delivery), Payment Due Date, Event End Date, Tasting Start Date, and Transaction Verified Date. Selection of this determines your other options.
- When, select before or after the date.
- Value, the number of the chosen Units (1, 2, 3….)
- Unit, amount of time to base the scheduling on, day, week, month, or year.
- There are toggles to either turn on, or not.
- Send after a specific time. By turning this on, you can select at which time the message will be sent after. You may want to choose to send during business hours by choosing after 9:00, so the message seems less automated. If not selected, the message will be sent after midnight. This is not available for Transaction Verified emails as they are sent upon verification.
- Only for specific event types. By turning on, you choose which event types receive the message. For example, you can send only weddings a reminder 6 weeks before the event date to submit menu choices. You can select multiple event types. If not selected, all event types will receive the message.
- Only for specific appointments (Appointment date only). By turning this on, you select the type of appointment that receives this message. Allowing you to send one reminder for viewings, while another for meetings. Item delivery is the third appointment type. You can select multiple appointment types. If not selected, all three appointment types will receive the message.
- Select the template to send, the templates available are the types associated with trigger event. See Templates for more information on template types.
- Review your configuration to be sure it is as you want.
- Click Save in the upper right corner. You will see the listing of your newly created scheduled email with an Active status in green.
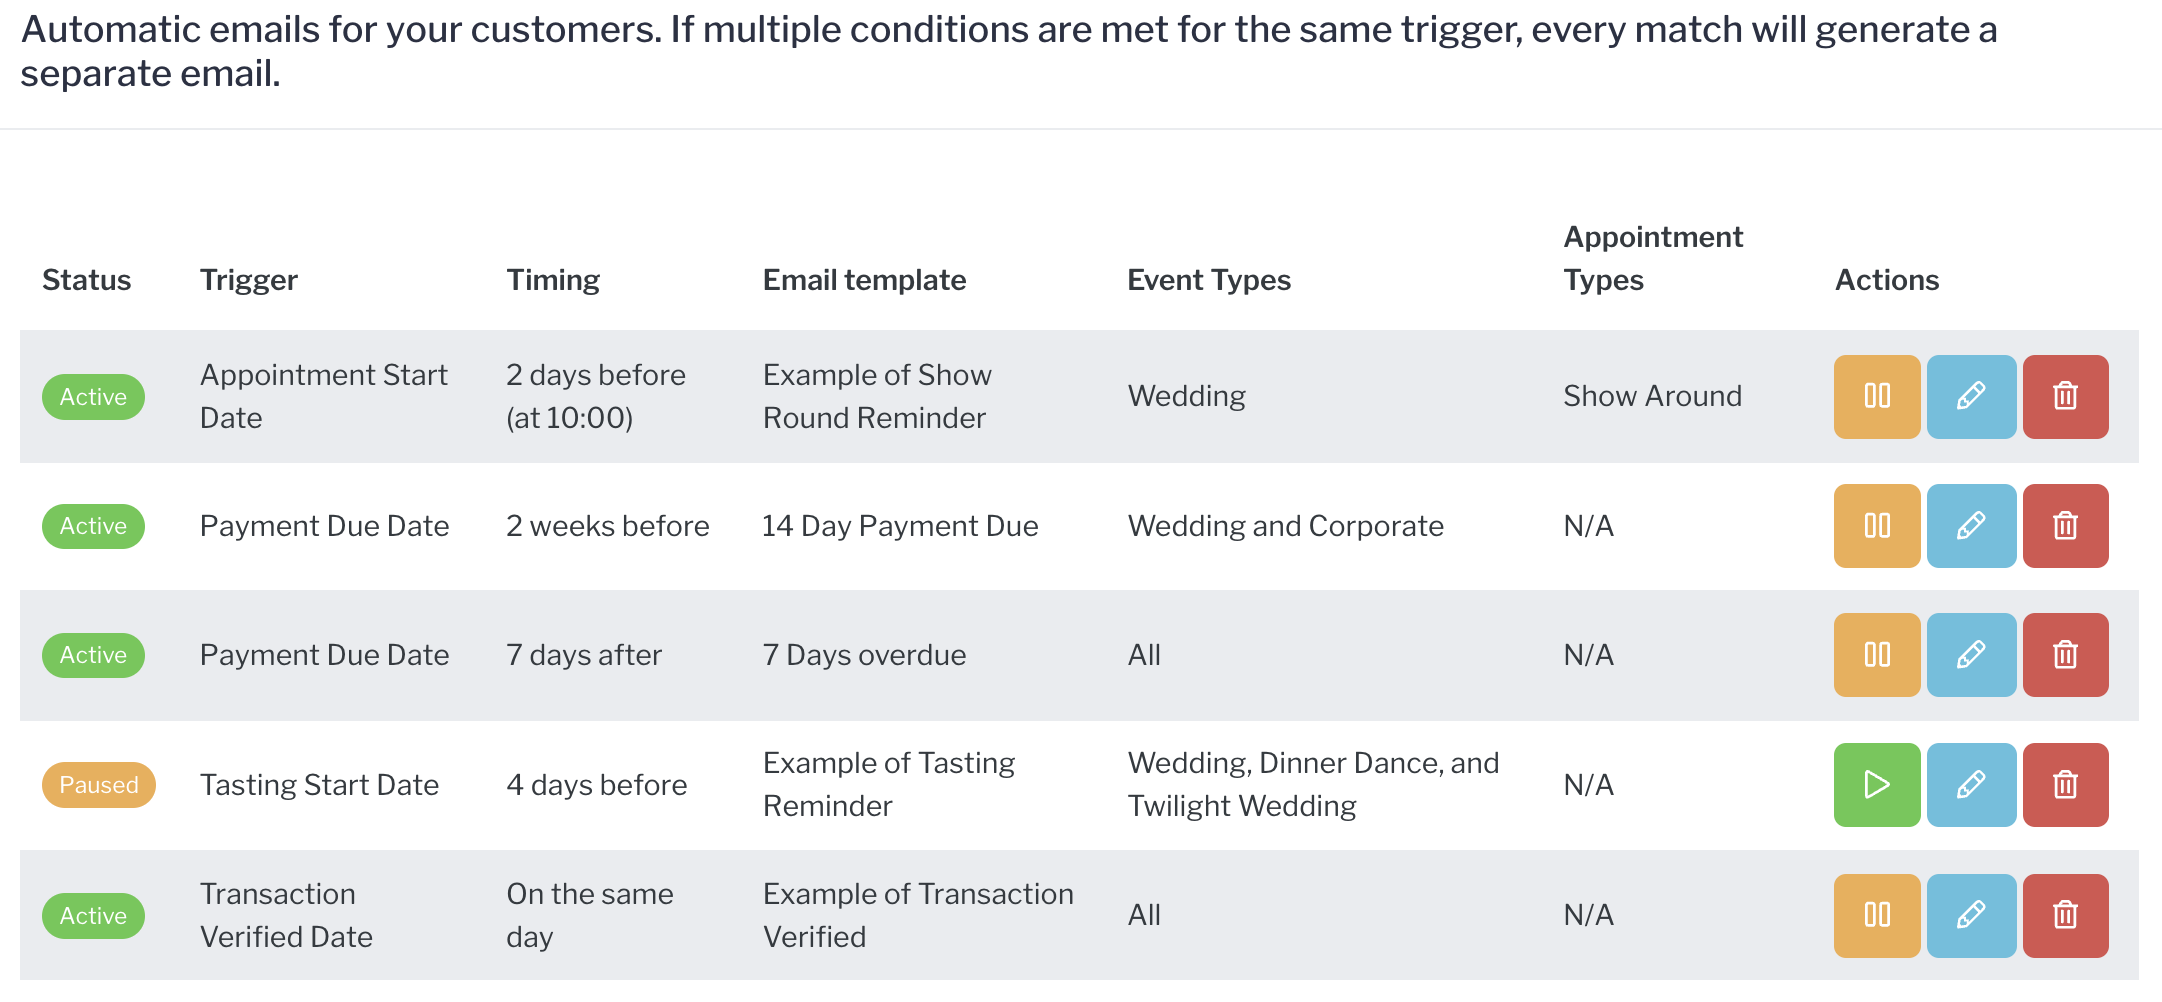
How to pause scheduled emails
- Navigate to Automatic Emails. Venue>Automatic Emails.
- To pause an email, click the orange pause button. There will be a pop up confirmation box. The status will change to Paused.
How activate scheduled emails
- Navigate to Automatic Emails. Venue>Automatic Emails.
- To reactivate a paused email, click the green play button. There will be a pop up confirmation box. The status will change to Active.
How to edit scheduled emails
- Navigate to Automatic Emails. Venue>Automatic Emails.
- Click on the blue edit icon associated with the email schedule you want to edit.
- Edit any of the configurations you need to, including changing the template chosen.
- Click Save.
How to delete scheduled emails
- Navigate to Automatic Emails. Venue>Automatic Emails.
- To delete a scheduled email, click the red delete icon. There will be a pop up confirmation box. Deletion is permanent.