

The next step in the planning of a new event is to book your new lead into your Sonas calendar with a planned meeting or tour of your wedding venue.
Step-by-step guide:
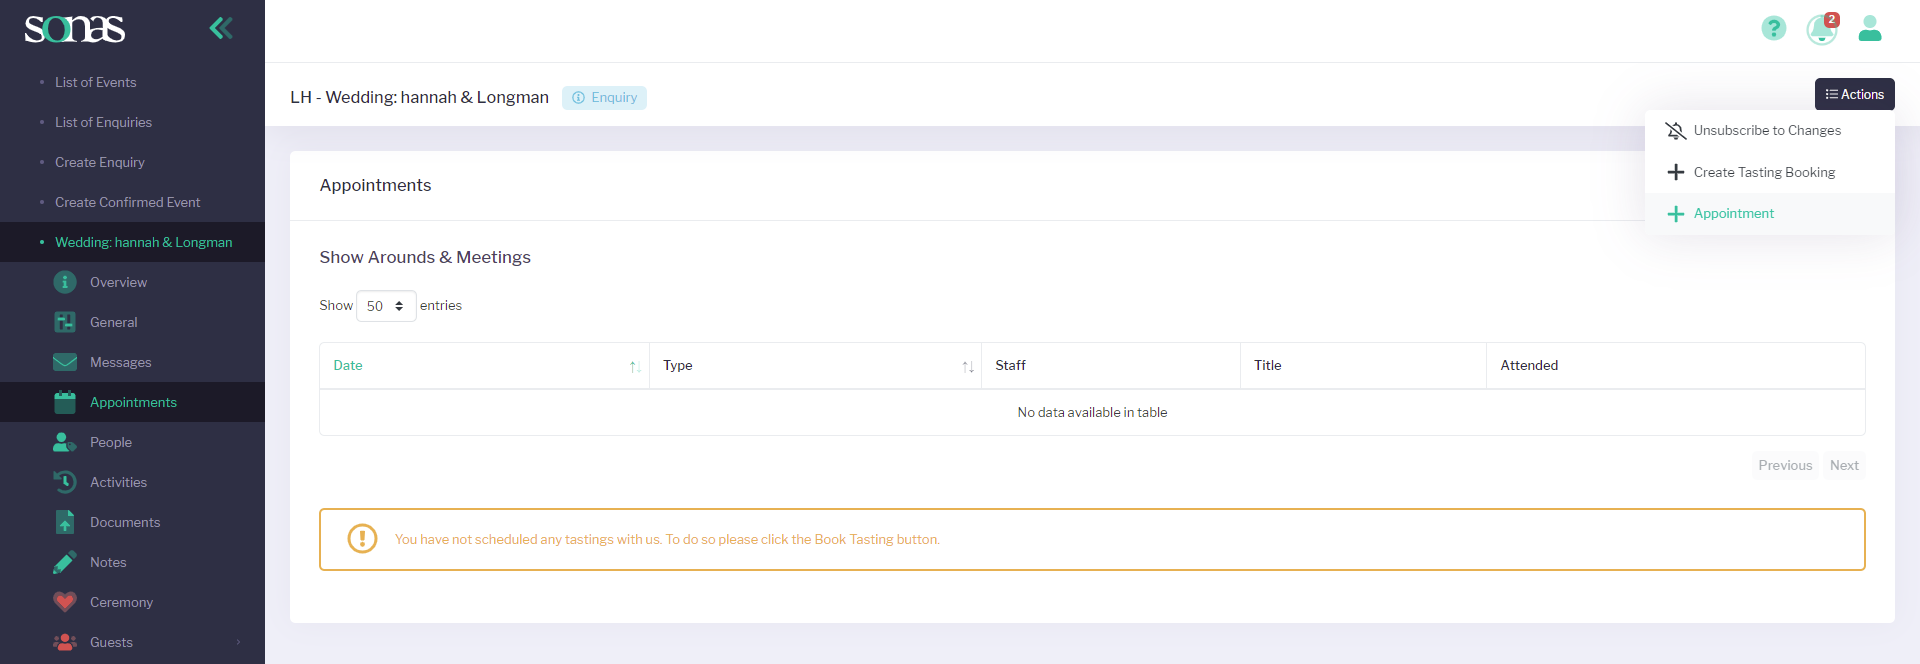
To add in a new meeting or show around, click on the Appointments section of your customer’s event sub menu.
Click the Actions menu in the top right hand corner and then + Create Appointment (you can also + Create Tasting booking here too)
On the Create New Appointment page, fill out all of the boxes including:
Type (choose from Meeting, Show Around / Viewing or Item Delivery)
Title (optional description, e.g. Final Planning Meeting)
Start Date and Time (of the appointment)
Staff (involved in the appointment)
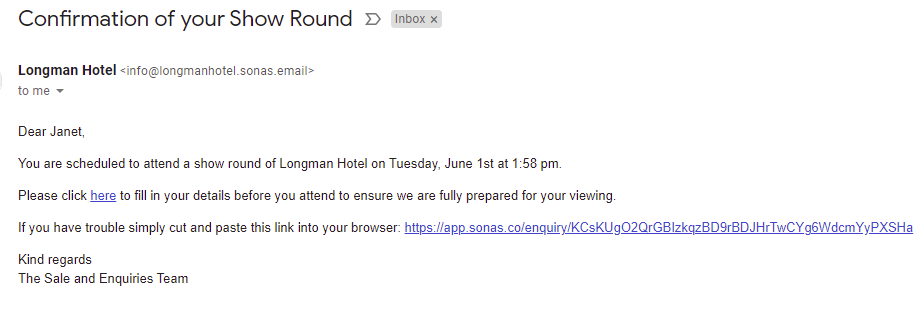
Notify Customer via Email ( Choose either None or one of your template confirmation email )
When choosing your template you can prompt the customer for more information if you so require. If the template you select includes the special token {{url}} the template confirmation emails include a link to an enquiry form for the clients to fill out prior to their appointment. In our example data the template "Example of Show Round Confirmation 1st" contains this link whereas the others do not. This form is designed to capture more information about the couple's specific wedding details in advance of their visit and is ideal for viewing appointments. These details include expected guest numbers for the event and additional personal details of the enquirer.

The information provided here will automatically pre populate the information into the couples’ Ceremony and Guests categories, at the bottom of the event sub-menu.

Note: Default templates include Example of Show Round Confirmation 1st and Example of Confirmation 2nd. You can find out how to amend these email templates by clicking on the guide to setup your email templates)
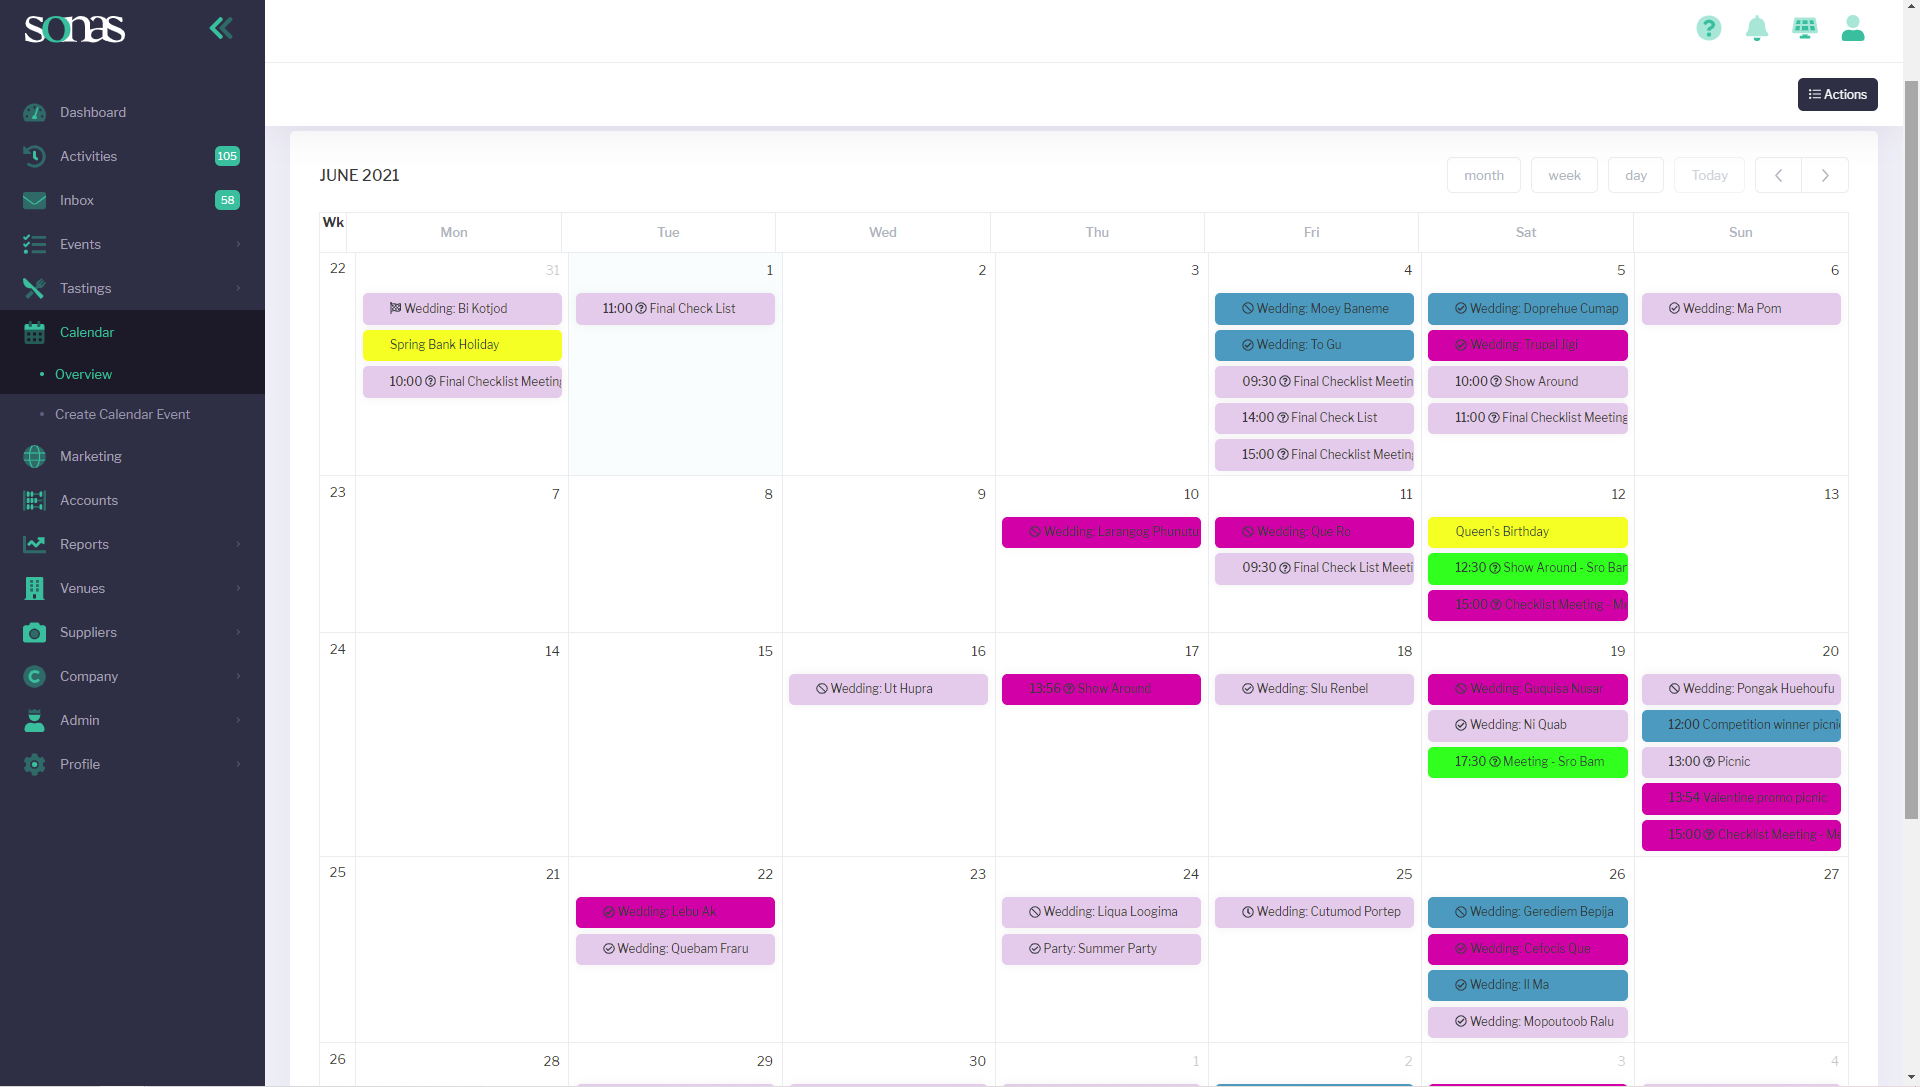
Once confirmed, this meeting will be added to your Sonas events calendar. You can see this by clicking on Calendar in the main side-menu.
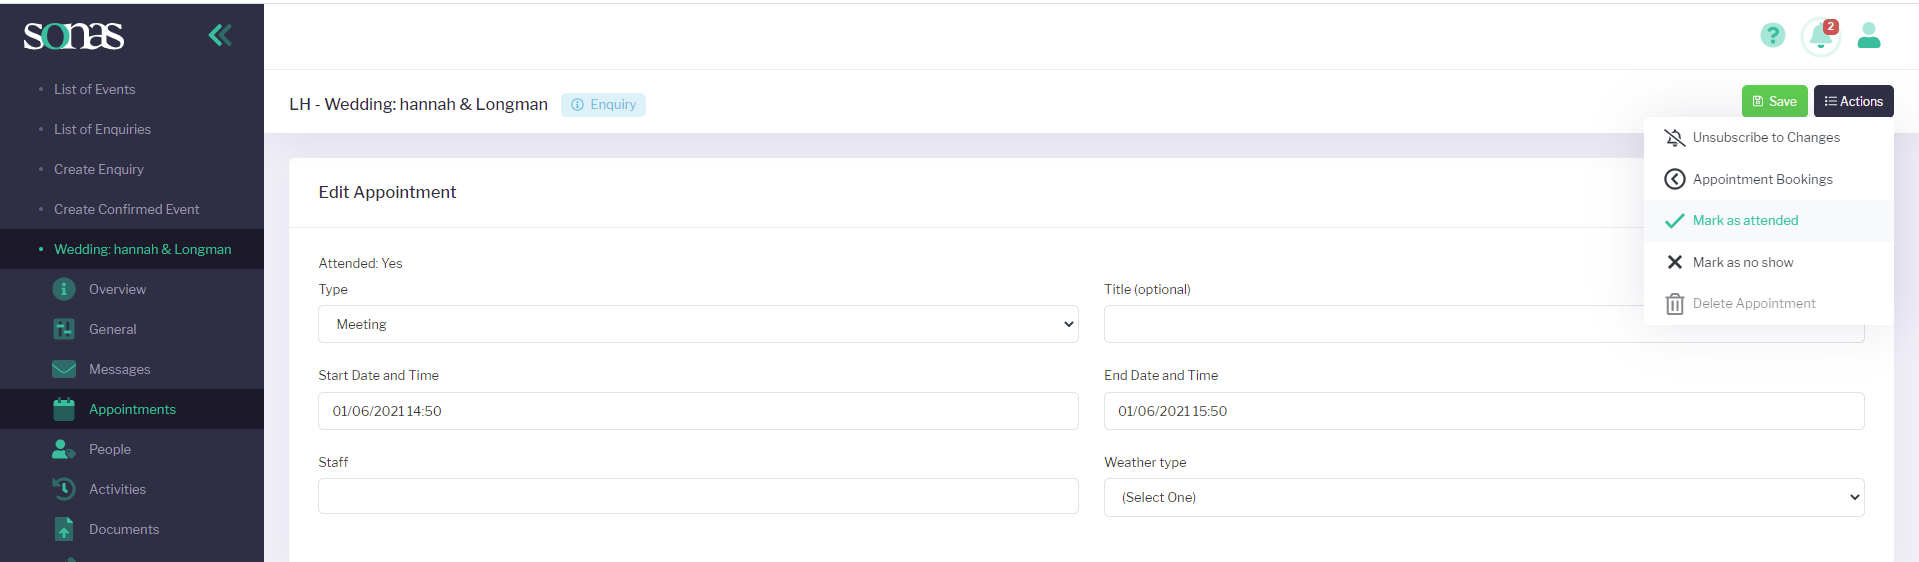
 After the date of the appointment, you can confirm whether the appointment was attended or not by clicking back into the Appointments menu.
Click on the specific meeting or show around you wish to confirm as attended or not.
Click the Actions menu in the top right hand corner and then ✔ Mark as attended or X Mark as no show.
This will now update your Activities log in the event sub-menu so you can keep a track of all activities and bookings associated with this particular wedding.