Credit Notes and Discounts are available in each event’s Transaction section as tools to maintain an accurate financial record of the event.
First, let’s define the two items:
Credit Notes are applied to a specific invoice. For example, a couple has paid all or part of an invoiced amount and you want to show a refund of a specific amount, you can create a credit note associated with that invoice. Some scenarios where credit notes are useful include:
If a customer pays and then it is realised that the amount charged was incorrect and the customer actually overpaid.
If the invoice was created with the wrong amount and the customer paid the correct amount.
TIP: When pre-confirming (pre-confirming an event) an event make sure you select the correct payment plan and pay attention on the final review page that the dates and amounts are correct (or adjust if necessary).
Discounts are applied to reduce the overall amount due. For example a discount for booking within a promotional period or paying a deposit within an allotted time frame. To apply the discount to a particular charge, select the same date as that charge and it will automatically be included in that invoice when it is due.
Step-by-Step Guide to Credit Notes:
Open the event transaction page, Event > Transactions.
Here is a look at an upcoming event’s transaction page, reflecting 3 upcoming charges as defined in the event’s contract.
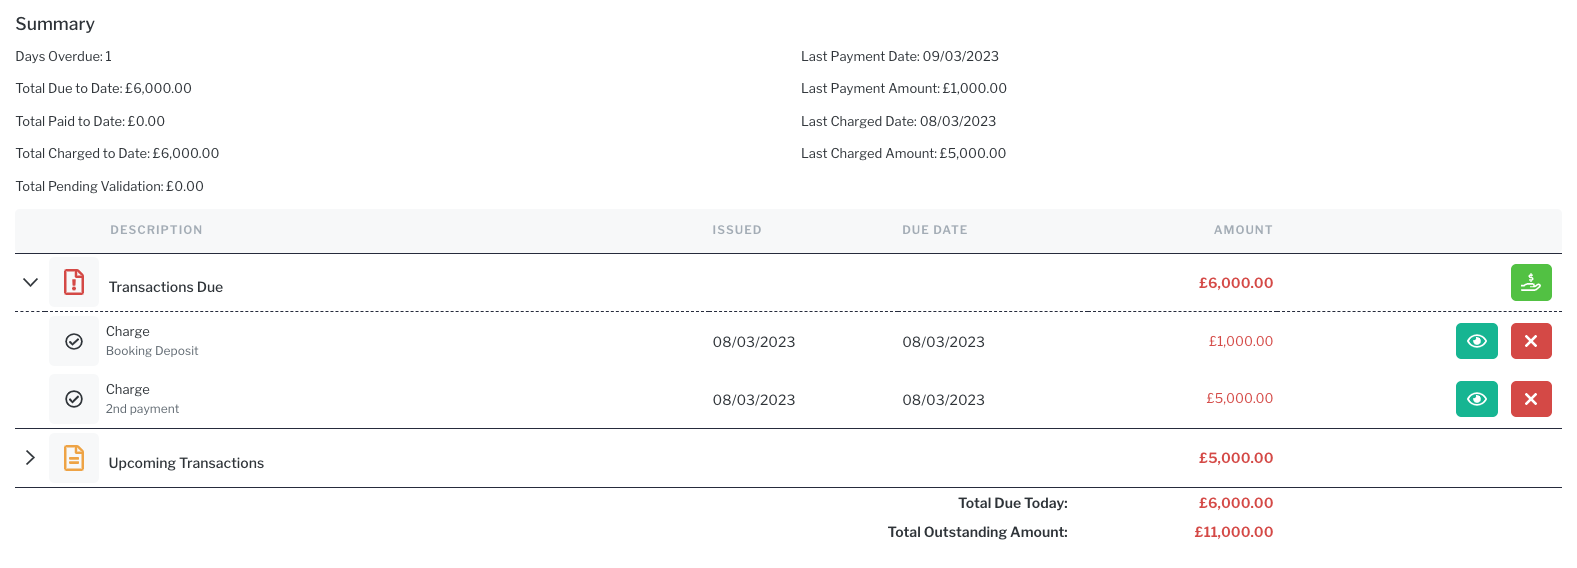
In this example, the due date of the 2nd payment is incorrect. So when the couple pays the booking fee, it looks as though they are past due on the 2nd payment.
In order to balance the ledger and not show the 2nd payment as overdue, we will create a credit note for that payment and then create a new charge reflecting the correct due date.
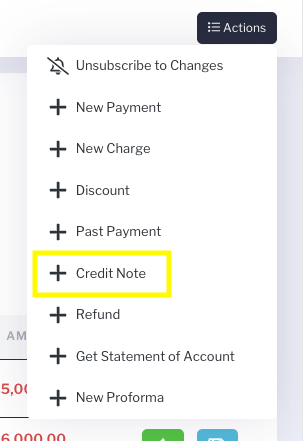
Actions > + Credit Note
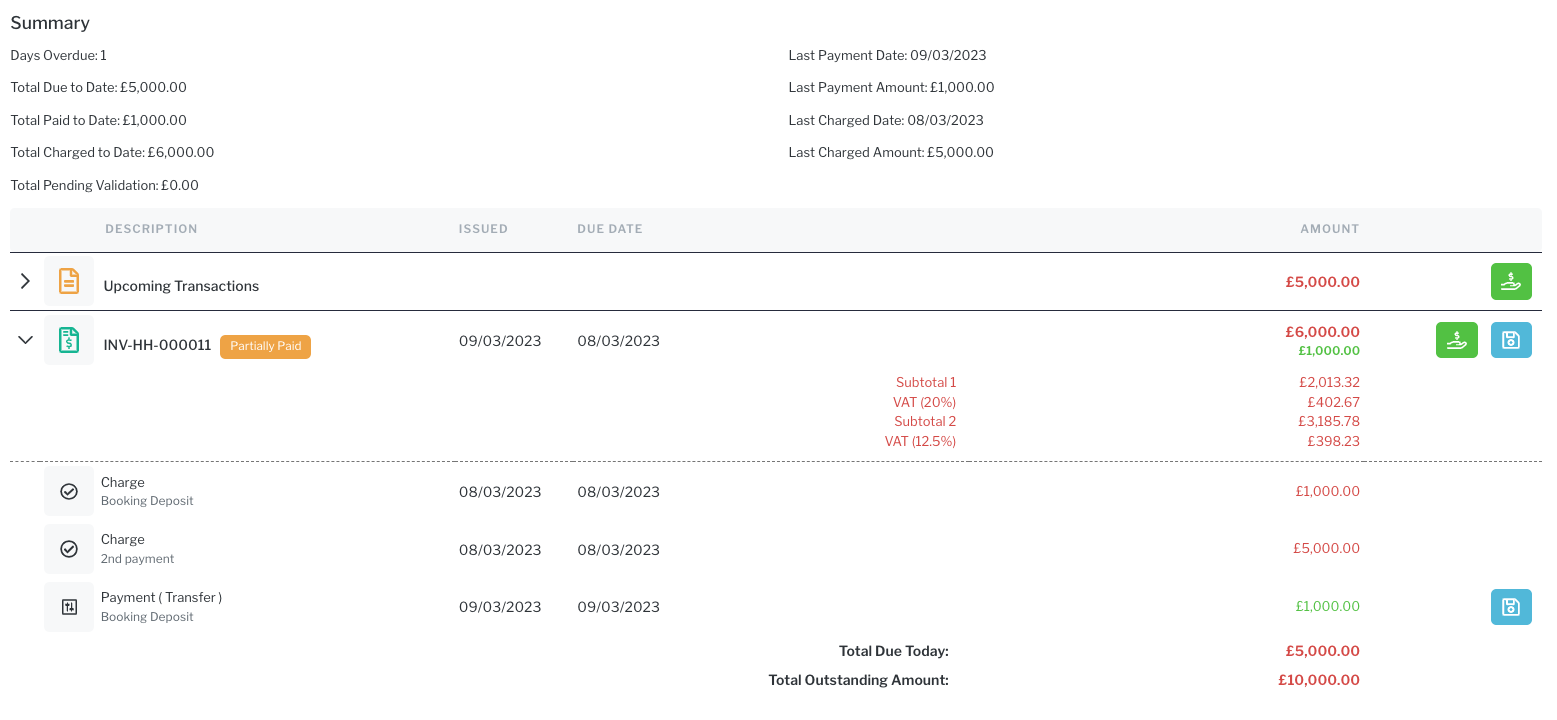
First, select the invoice the credit note will be associated with, then the date the note will be applied. Secondly, leave the values that need to be credited, while putting zero where there is no credit. In the example below, the booking deposit will stay as paid, so each item is zero. While each item for the 2nd payment remain, those are the amounts where the credit is applied. (The reason each charge is broken up is to calculate the accurate VAT rate as defined in Venue Invoicing).
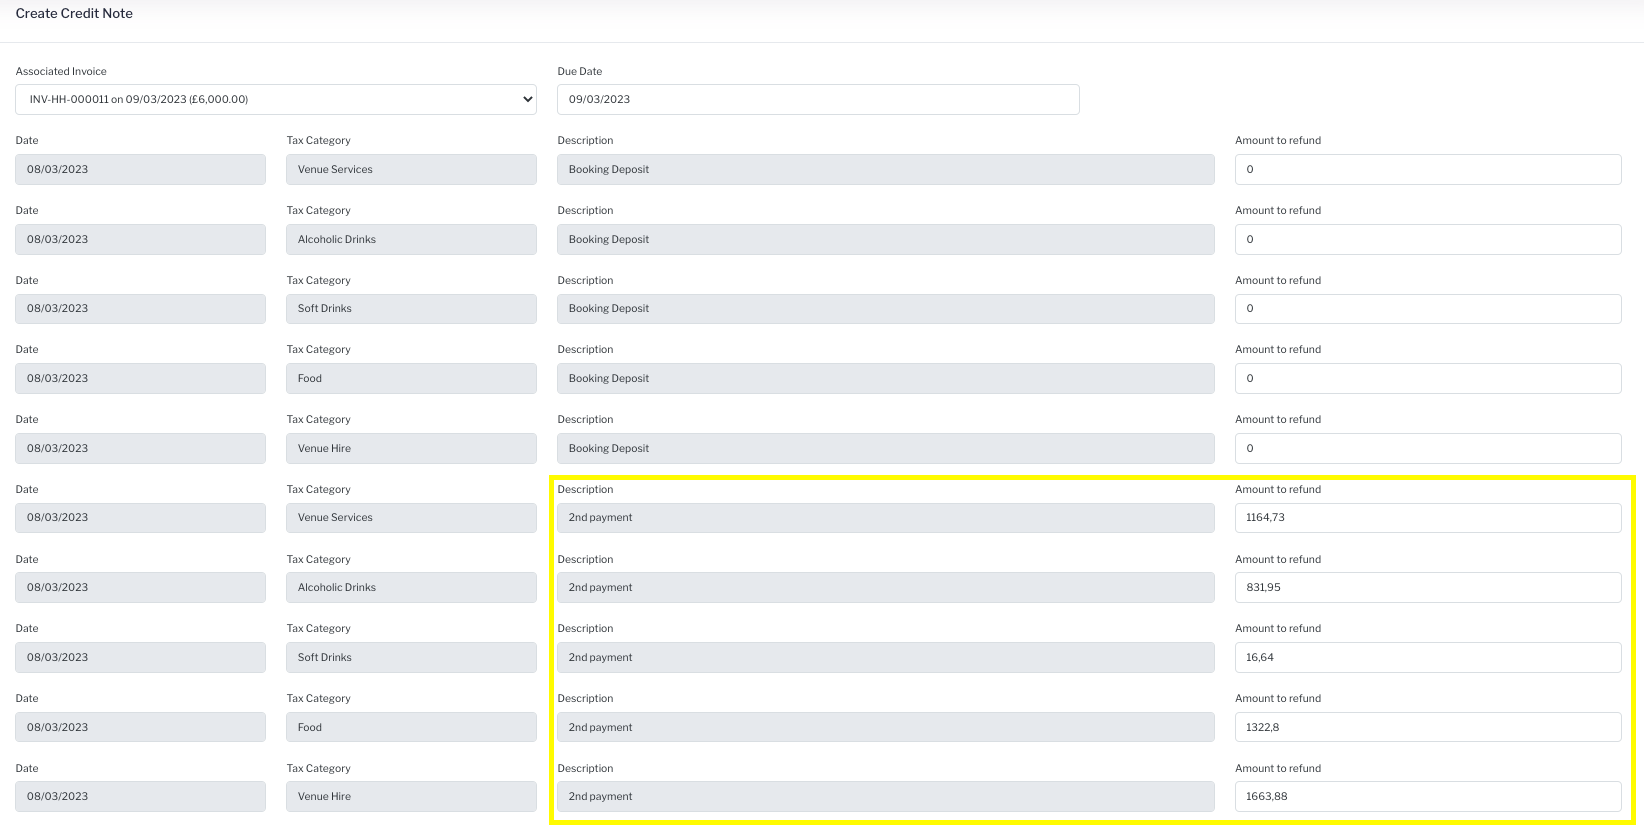
Click Save.
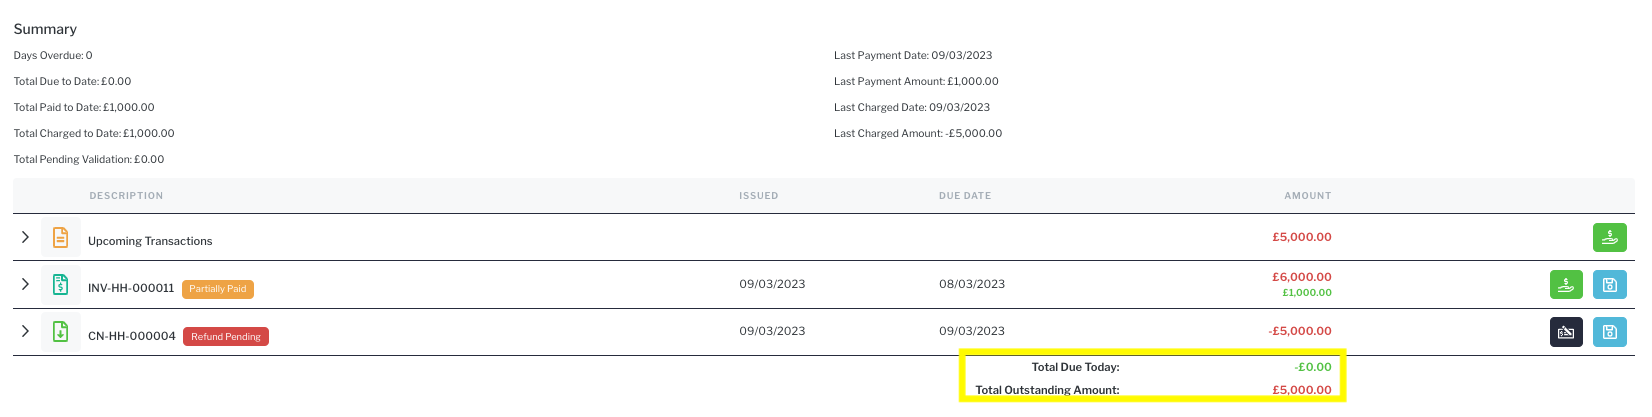
The credit is shown on the transaction page. It reads “Refund Pending” and will stay that way. IF this was a case where the credit note was in fact a refund of money, you would then click the black icon on the right to capture the refund. In this example, you do not want to do that.
 Now, we can add a new 2nd payment with the correct due date. See Adding Charges.
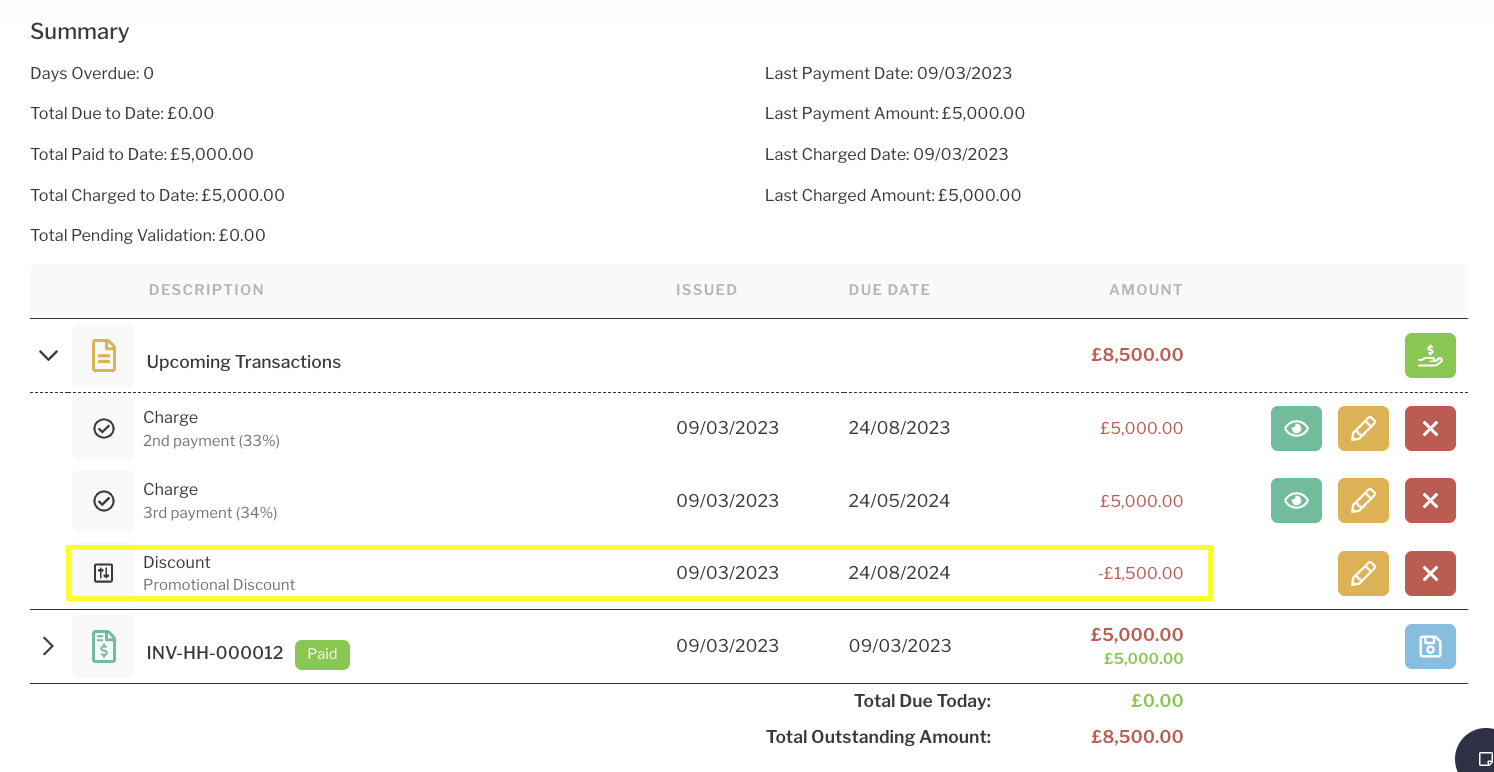
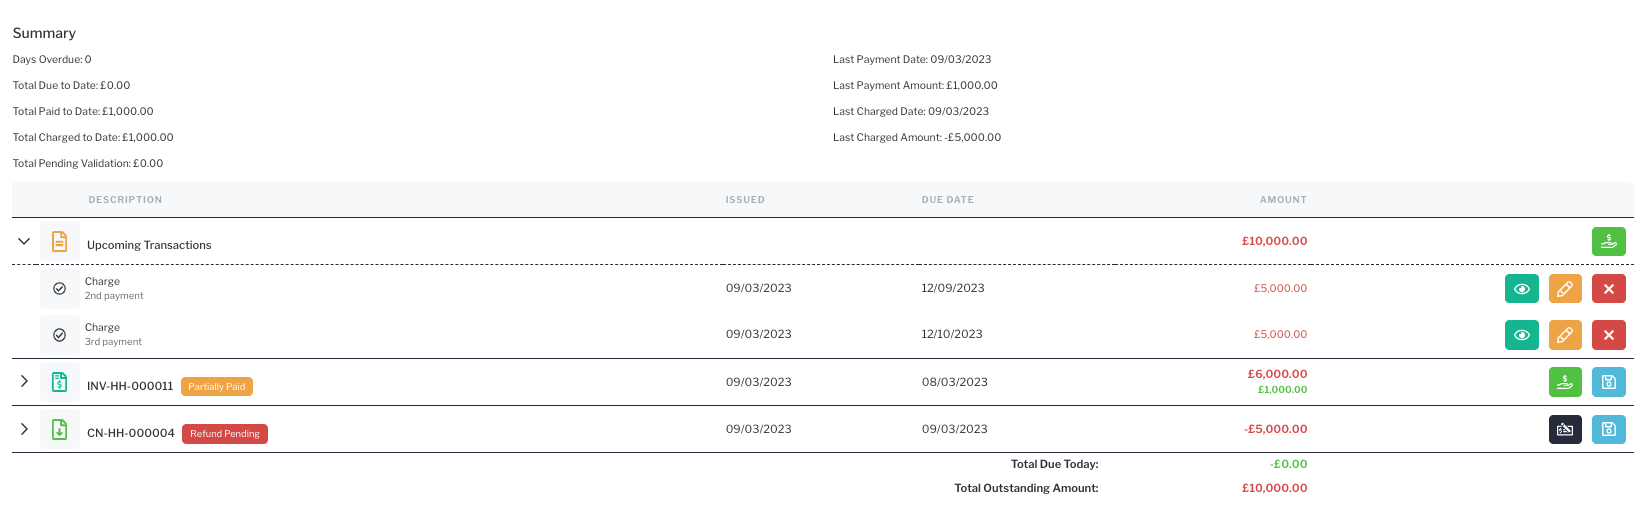
Here is the revised transaction page, showing the credit of the wrongly dated charge and the addition of the correct charge, and the correct Total Due Today and the correct Total Outstanding Amount.
You can create multiple Credit Notes against a single Invoice as long as you don't go over the amount originally charged per transaction category. For example, if 100£ of a 1000£ invoice is for food, you can only refund up to 100£ on that invoice in food, it can be multiple credit notes, but not more and 100£ in food. You will still have access to other categories to refund.
Now on to Discounts....
Step-by-Step Guide to add Discounts:
Open the event transaction page, Event > Transactions.
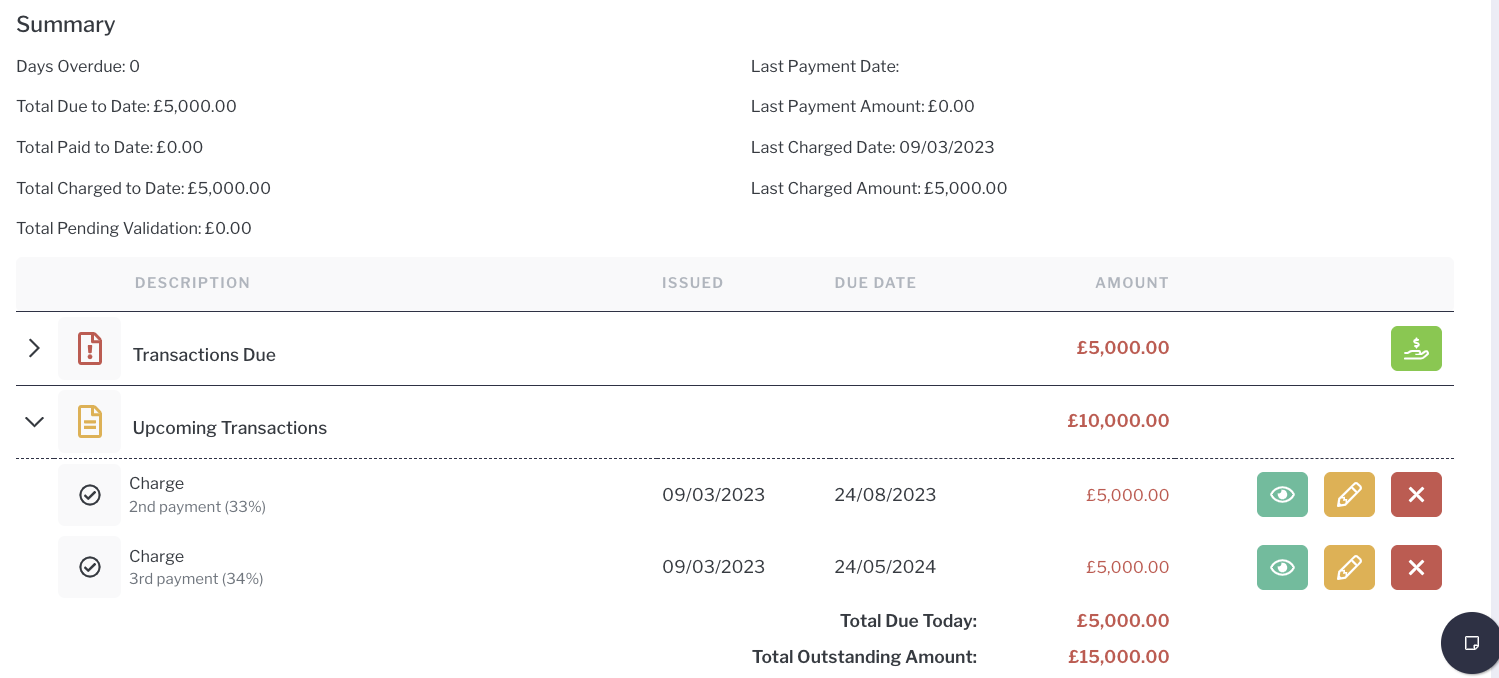
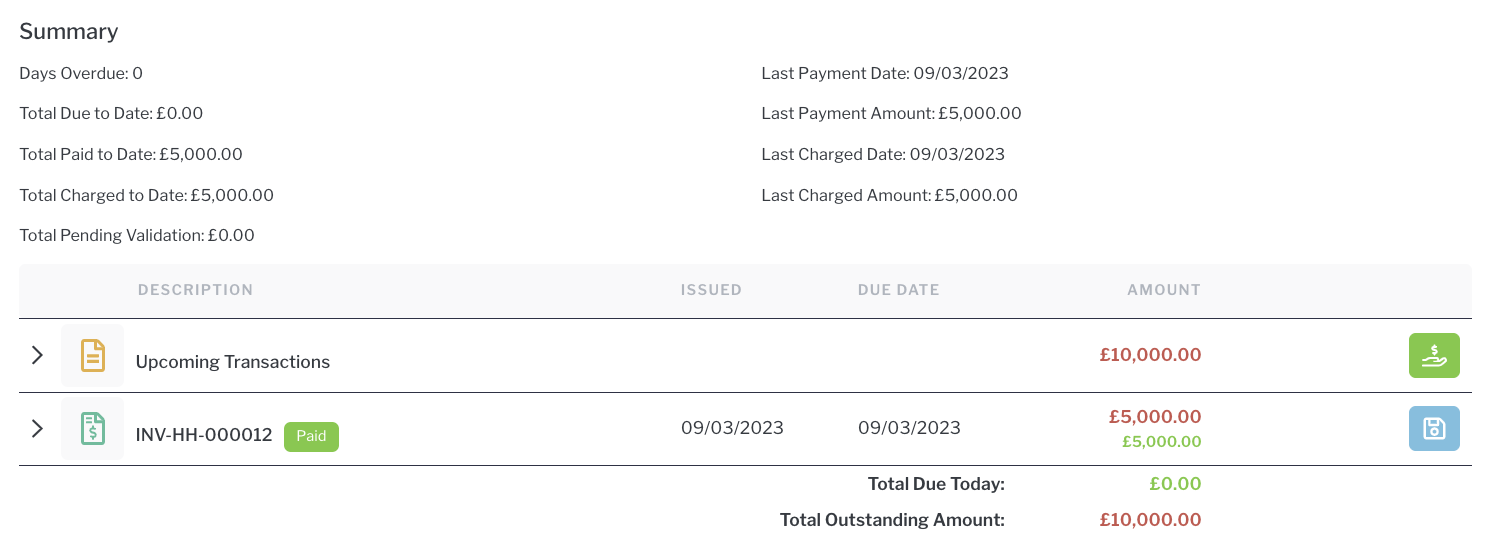
Here is a look at an upcoming event’s transaction page, reflecting 3 upcoming charges as defined in the event’s contract, including the Booking Payment which is due today.
Due to a promotion, if the customer pays the booking payment within 7 days of the contract being issued, there will be a 1500 discount on their second payment. They make their payment in the allocated window.
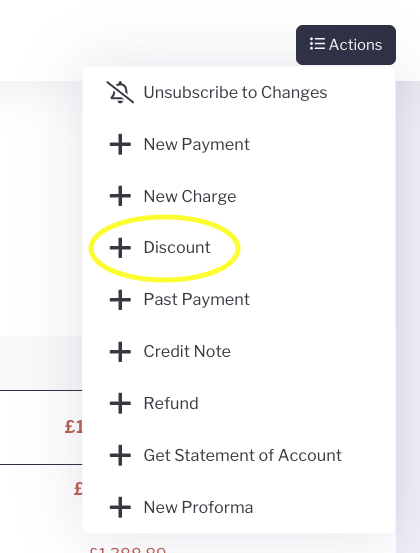
Now you can issue a discount on their second payment per your agreement with the customer.
Click Action > + Discount
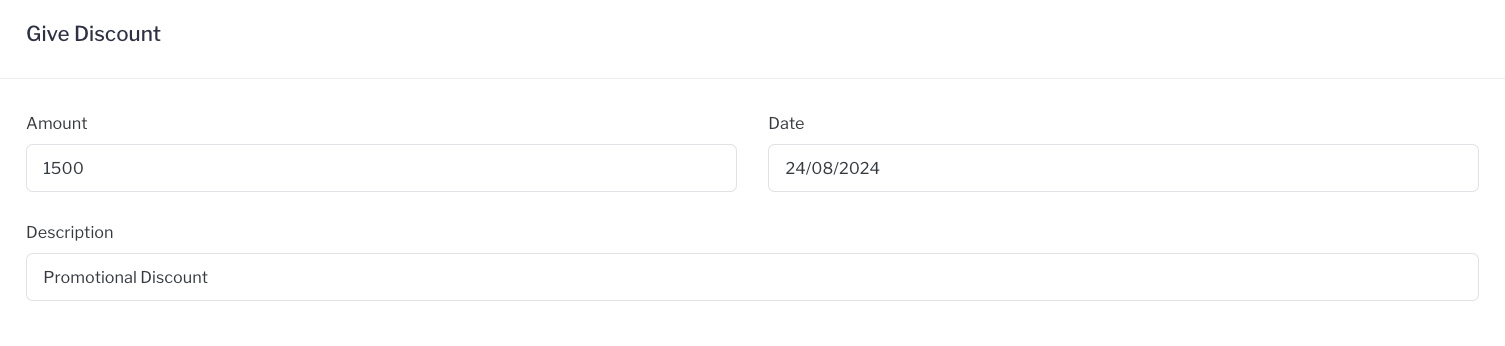
Fill out the date fields with the amount, date to be applied and a description. By choosing the same date as the due date of the 2nd payment, the discount will be applied to that charge.
If you choose a date in the future, the discount will not apply to the bottom line until that date. It is recommended to not date the discount out too far.
 Click Save.
The Discount appears under the Upcoming Transactions, dated the same as the 2nd Payment charge. The Total Outstanding Amount reflects the discount applied. You can edit the date or description by clicking on the orange edit icon.