

Once a venue has been created (Create Your Venue), you will automatically be taken to the General section where you can input more details about the venue. This is an important step in the initial setup of your venue as it includes the configuration options for customer access, deadlines for section completion, and the automatic reply template setup, amongst other things.
This article will show you how to manage your Venue configurations.
If you cannot see this section or get permission denied messages with any of the actions, please contact your Company Admin in order to get the required permissions.
Video
How to configure your venue
Review the venue details to ensure they are correct as per the original setup.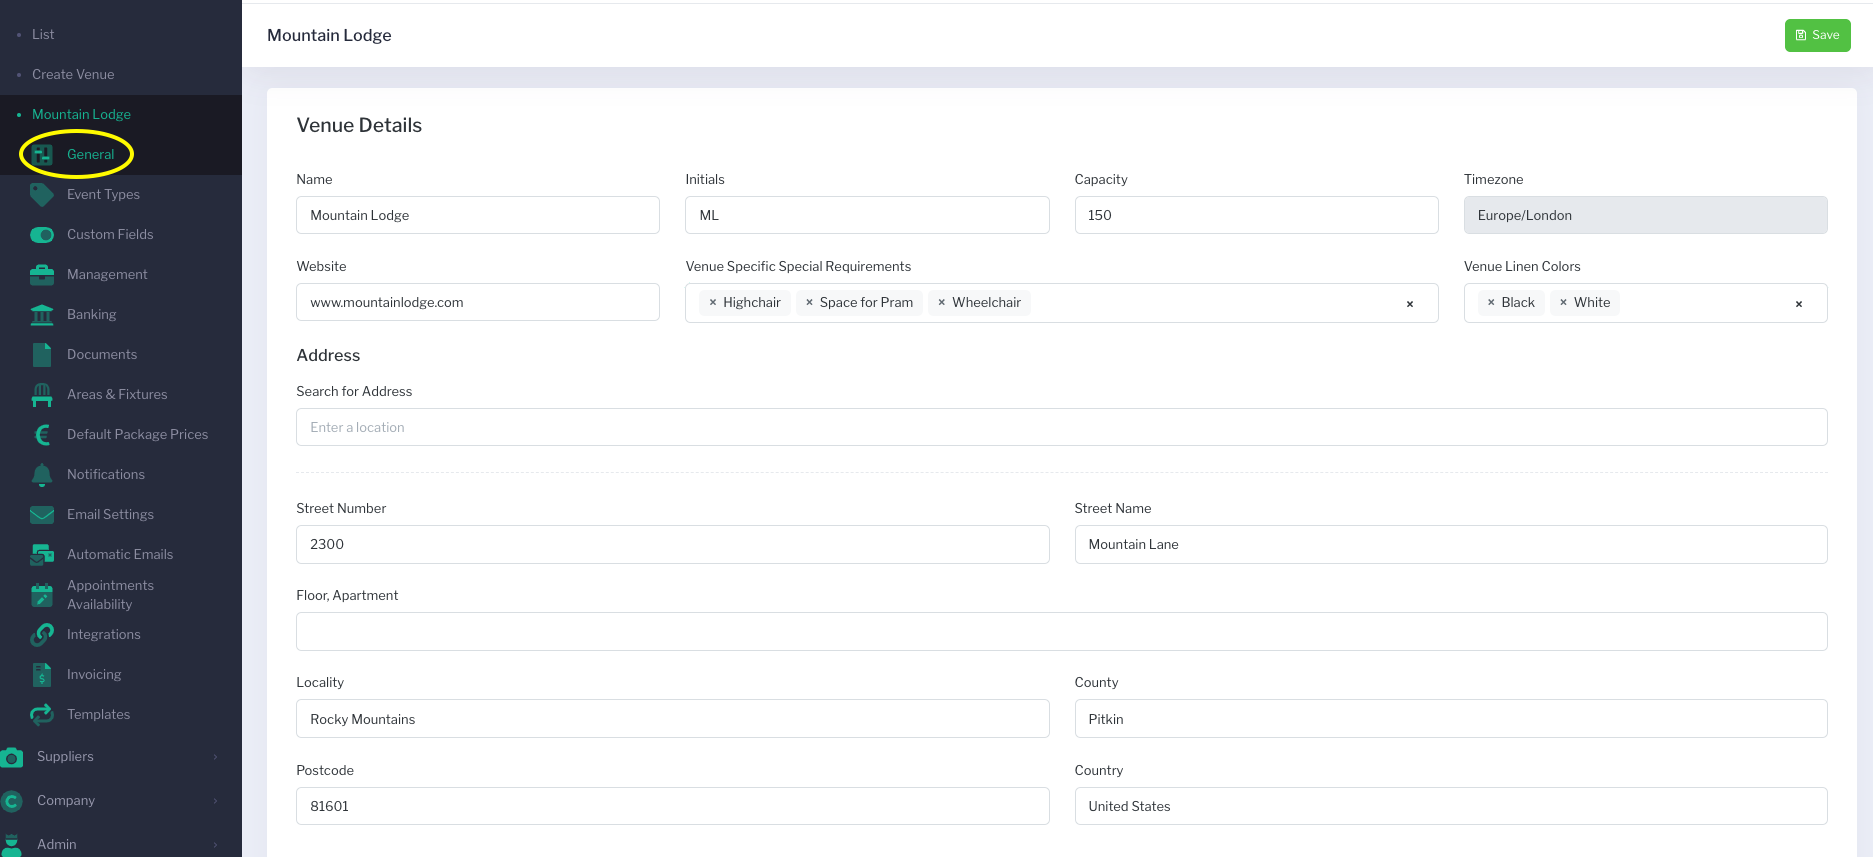
Scroll down the screen to get to the Calendar Colours. Choose the colours associated with the venue for the calendar and all venue labels on events throughout Sonas, or leave as the default. This is particularly helpful when you have multiple venues, you can quickly associate calendar entries and events to each venue by colour. These can be left at the default colours.

All of the below colour configuration are optional, you can choose to leave it as the default, or change later as you better understand the calendar and your venue's needs.
Customise the Availability Colours, there are four colours that you can customise- Full Availability background colour, Availability Text colour, Some Availability background colour, and No Availability background colour.

Tasting Colours can be selected as well, or leave to default.
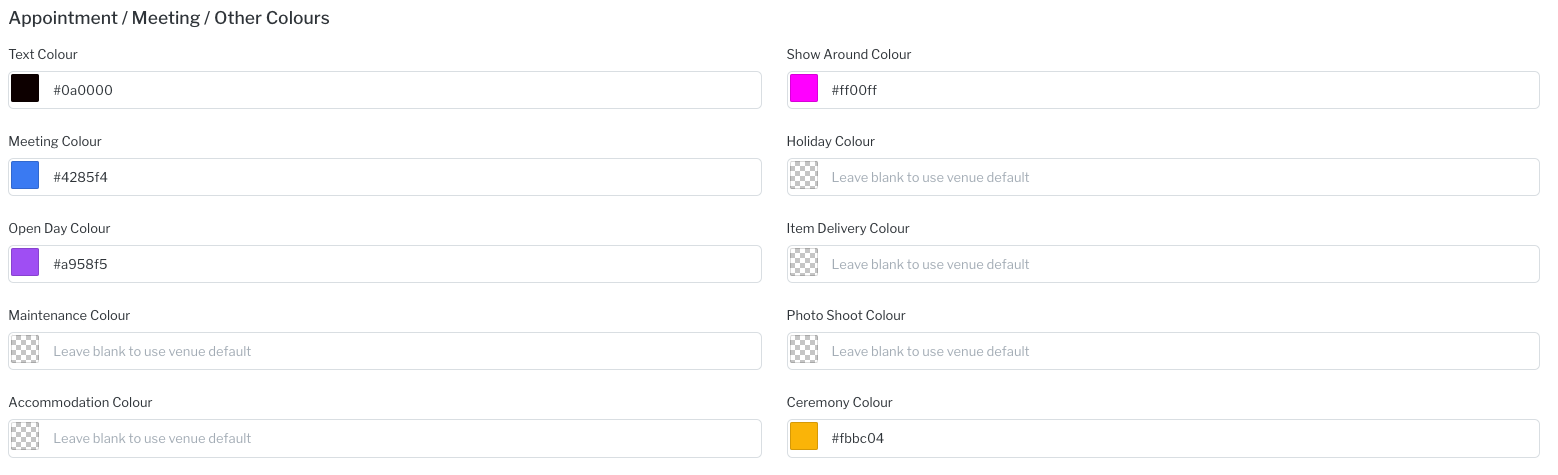
 Appointment/Meeting/Other Colours are additional means of using colour to orgnaise your venue calendar to your liking.
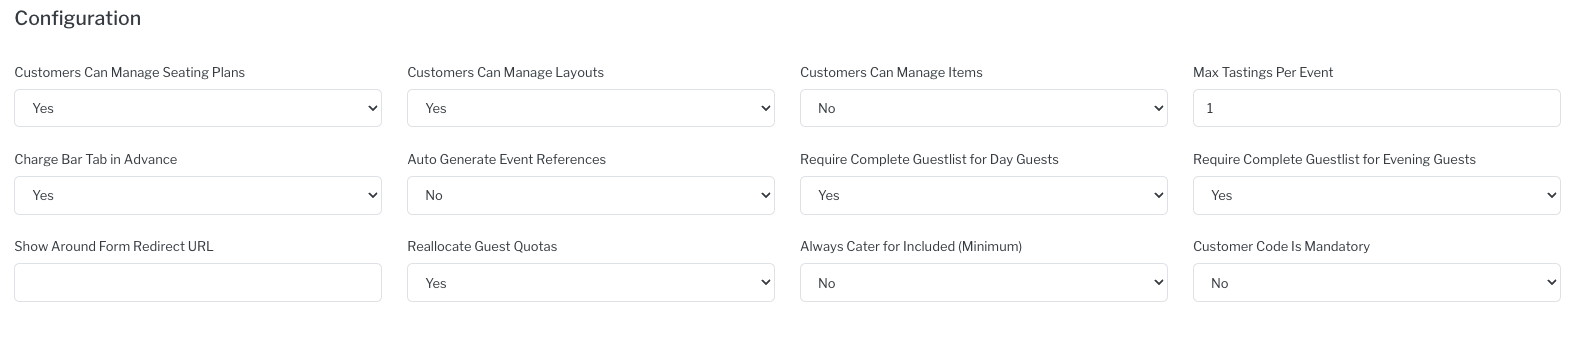
Configuration menu. The configurable options include: Customers can manage Seating Plans (Y/N), Customers can manage Layouts (Y/N), Customers can manage Items (Y/N). Each one is set to YES as default, but if you choose NO, the respective sections will be removed from view in the customer’s portal, allowing only the venue to confirm these sections.
The Configuration menu also includes an options for tastings (if applicable at your venue): Max tastings per event (default is set to 1). Also select if a defined bar tab should be charges ahead of the event when the bar section is locked. You can turn on or off the auto generation of a unique reference number. This unique 6 character reference will be generated upon creation of the enquiry or event.
You set whether or not complete guestlists are required for Day Guests and/or Evening Guests. If No, then the customer can submit their guest section with say 60 confirmed guests and only 10 on the guestlist. Yes would prevent this (if required for food selection, dietaries, etc).
Show Around Form Redirect URL is an optional URL to redirect the optional Show Around Questionnaire when submitted. You can redirect to a thank you page, how to prepare for a show around, etc. See Show Around Questionnaire.
Reallocate Guest Quotas, Yes will allow guest numbers to be reallocated. If you have 80 included adults and no kids, but the guest count ends up at 75 adults and 5 kids, the extra 5 adults will be reallocated to kids, so the kids won't be charged additionally.
Always Cater for Included (minimum), if YES and you have an event with 80 included and 75 confirmed, the cater for number for say Canapés will be 80 (the included) instead of the 75 (confirmed). Allowing you to cater for the number of people paid for, rather than the number in attendance.
Customer Code can be made mandatory here. If mandatory, there will be a field in Step 1 of the pre-confirmation workflow that is mandatory. If the code had not been added during the sales process, you will have to add here to proceed. Customer codes are useful for repeat customers or for the use with accounting software, such as Sage. See Customer Code.
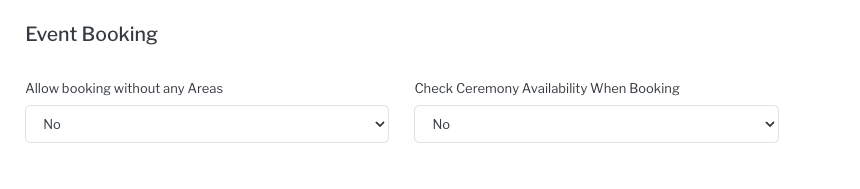
Event Booking. This section is to allow you to use enhanced availability features to 1. either prevent, or allow double bookings and 2. utilise ceremony availability. Allow booking without any Areas defaults to NO. This requires staff to assign all events to a specific area when putting a date on hold or confirming a date. This prevents double bookings. Changing it to YES, allows you to put a date on hold or to make a booking without selecting an area. This is a way to book multiple events at the same time (double book). Check Ceremony Availability When Booking defaults to NO as well. If you are a venue that holds multiple ceremonies on the same day, by selecting YES, you will be prompted to check ceremony availability. Note: you will need to define ceremony availability first, under Venue > Calendar Availability > Ceremony.
 Section Deadlines. Input, in weeks, prior to the event, the deadlines that you wish to set for the completion of: Drinks Order, Services/Suppliers, Menu Choices, Guests List, and Bar Options. These deadlines will create a prompt on the customer’s homepage to ensure the completion of these sections before the specified date.
 Section Payment Dates. Here is where you will set the due date for all extra payments. (i.e. food upgrades, drink upgrades, services) Set the date using the number of weeks before the event date.
 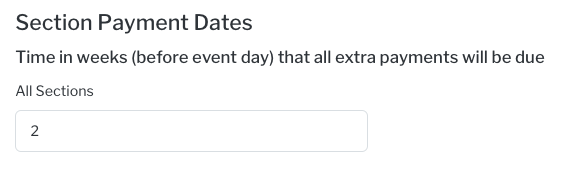 The Activity Setup menu allows you to determine which activities require verifications and what type of activities generate a staff or customer notification in Sonas. These notifications arrive in the activity dashboard as unverified (pending activity) until the task is completed and the staff member has marked it as verified. There are a number of default options already in place but this can be amended as necessary to ensure your staff get the notifications required for each event.
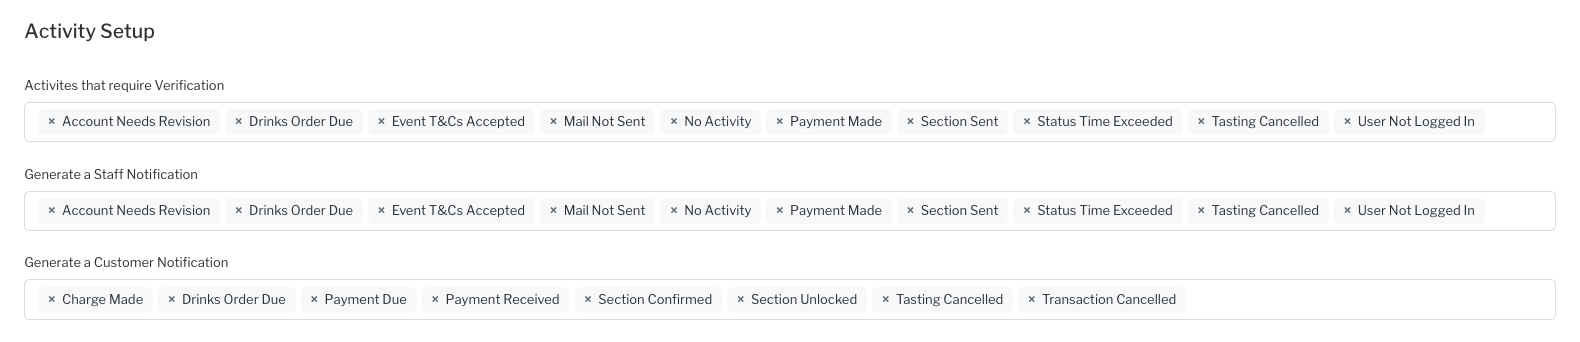
The State Limits menu. Here you state the time (in days) that certain enquiries or events remain idle before generating a warning that there has been no activity in that timeframe. This allows you to set a prompt for staff to follow up on enquiries or events as required. The default prompts are set for customers at the stages of Enquiry, Date On Hold, and Confirmed-Pending. But they can also amend notifications for Confirmed, Cancelled, Exhausted, Completed, and Idle statuses if required.
Click Save in the upper right hand corner to update your venue’s configuration.