Sonas assists in sending bulk emails to a targeted contact list in two ways: through a Sparkpost integration (owned by bird.com), or by exporting the targeted list to an external tool. This article will provide you with the step by step to send bulk email using an external tool, like Mailchimp.
If you cannot see this section or get permission denied messages with any of the actions, please contact your Company Admin in order to get the required permissions.
How to export your email list
- Navigate to the Marketing Section from your main tool bar.
- Complete the filters to create your targeted email list.

- Actions > Export Emails
- Find your list in your download file Profile > Downloads
- Upload or copy and past your emails into your external bulk email tool.
How to use your email list in Mailchimp
The following steps are provided by the Mailchimp helpguide on importing files, which can be found in their entirety here: Mailchimp, Import your file
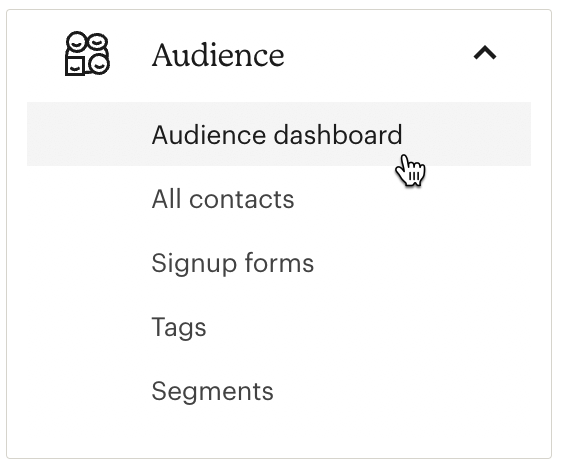
When creating your email campaign, click Audience.

Click Audience dashboard.

If you have more than one audience, click the Current audience drop-down and choose the one you want to work with.
Click the Manage Audience drop-down and choose Import contacts.
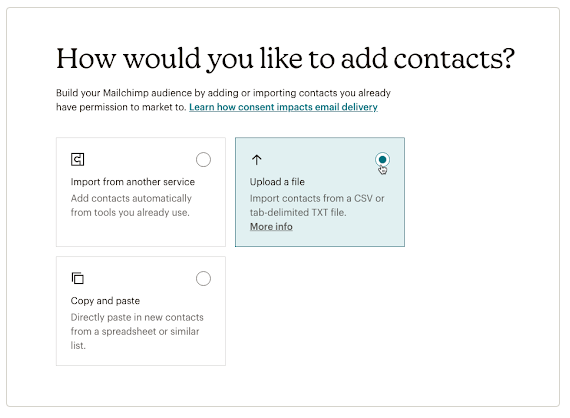
Choose Upload a file.

Click Continue to Upload.
Click Browse and choose the CVS file from your computer (the one you just created through Sonas in the steps above).
Click Continue to Organize.
Use the Select an audience drop-down to confirm the audience you want to import to.

Use the Select a status drop-down to choose the status of the contacts you’re about to import.

The available statuses for contacts are: Subscribed (if importing subscribed contacts, be sure you have permission to send them marketing, see the Mailchimp helpguide linked above for more information), Unsubscribed, Non-subscribed, Cleaned.
When you’re ready, click Continue to Match.
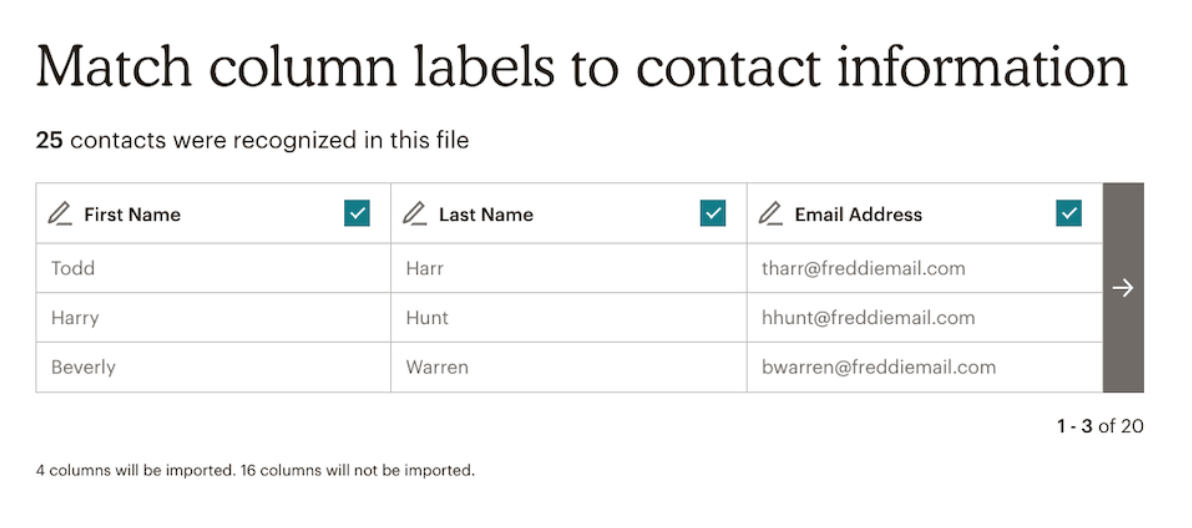
Match the columns in your import file to the fields in your Mailchimp audience. Mailchimp will automatically match some columns for you. For example, the column that contains email addresses will match the required Email Address field.

Click the column header to choose a different field type for the column or to create a new field. Repeat for all unmatched columns that you want to import. Any unmatched columns will not be imported.

Click Finalize Import to review your import settings.
If everything looks good, click Complete Import.
That's it! After the import is finished, Mailchimp will send a notification to the email address associated with your username.
Related Articles and Links
How to Setup Sparkpost in Sonas


