

Sonas provides a shared email inbox for your venue(s), which is set up during your initial onboarding. This inbox is accessible to your staff, serving as a central hub for managing all customer communications.
To stay on top of messages, it’s important to understand how the inbox works. This article will guide you through the best practices for managing your inbox efficiently.
If you cannot see any of the discussed sections or get permission denied messages with any of the actions, please contact your Company Admin in order to get the required permissions.
Video
Key Principles
- Think of the inbox as a task list: Each new message requires action, whether that’s noting down information, creating an enquiry, or replying to a customer.
- Customer communication only: The inbox is designed exclusively for customer communication. For more details, please see our article on Sending Messages.
Locating the Inbox
You can find your messages in the Inbox section of the main navigation menu. The number displayed next to it indicates the count of unread messages, representing the number of tasks that require attention.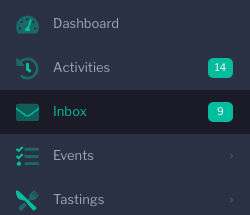
Using Inbox Filters
At the top of the inbox, you will find several filters to help you focus your view or locate specific messages.
- View: Choose between your Inbox (for active messages) and your Bin (for deleted messages).
- Assigned: Filter by who the message is assigned to: Anyone, Yourself, or Nobody.
- Status: Select from All, Read, or Unread messages.
- Venues: If your company manages multiple venues, you can select a specific venue or view messages for all venues.
- Categories: Refine the list by selecting one or more categories assigned to the messages. For new enquiries, this will default to 'Sales'. You can configure your categories under Company > Categories.
- Search (Email/Author/Subject): Search for a specific message using a minimum of three characters.
To save a particular set of filters for future use, navigate to Actions > Save Current Filters. You can revert to the standard view at any time by selecting Actions > Restore Default Filters.
Understanding the Inbox Layout
The inbox is organised into columns for easy scanning and identification.
- Selection Box: Tick this box to select one or more messages.You can hold Shift to select a range of messages, or hold Ctrl (Windows) / Command (Mac) to select multiple non-consecutive messages. Once selected, use the Actions menu to perform bulk actions.
- Status: This icon indicates the state of a message.
- Unread (Black Envelope): An incomplete task associated with an event.
- Read (Open Green Envelope): A completed task associated with an event.
- Unassociated (? Icon): The sender's email address is not recognised by Sonas, and the message is not linked to an event.
Date: The date and time the message was received.
Category Icon: Shows the category the message belongs to.
Assigned: Displays the initials of the staff member(s) the task is assigned to.
Venue: Indicates the venue the message relates to (for multi-venue accounts).
From: The name of the sender.
Subject: The email's subject line.
Message: A preview of the first line of the message content.
Performing Bulk Actions
After selecting one or more messages using the selection boxes, click the Actions button to reveal the following options:
Assign Selected Messages to Me: This assigns all chosen messages to you, making you responsible for the associated tasks.
Unassign Me from Selected Messages: This removes you from the list of assignees for the selected messages.
Mark Selected Messages as Done: This marks the task as complete for you. Note that a message is only marked as 'Read' (fully complete) when all assigned staff members have marked it as done.
Move Selected to the Bin: This moves the selected messages to the Bin.
How to Assign a Message
Assigning a message to a staff member makes them responsible for completing the associated task. When a message is assigned, the assignee and any staff subscribed to the event will receive a notification.
Click on the message you wish to assign, either from the main inbox or from within an event's message section.
In the message view, either click the Assign to Me button or use the Assigned Staff field to select one or more staff members.

Click the green tick icon to save your changes.

The initials of the assigned staff will now appear next to the message. The message status will remain 'Unread' until the task is completed.

How to Mark a Message as Read (Complete a Task)
When you have finished the task related to a message, you must mark it as complete. This is what changes its status to 'Read'. A message will only be marked as 'Read' once every person assigned to it has completed the task.
There are two ways to do this:
In Bulk: Select one or more messages in the inbox and choose Actions > Mark Selected Messages as Done. This will mark the task as complete for you.
Individually: Open the specific message.
To mark it as complete for yourself, click the 'Done' icon.
To manage assignees or mark it as complete on behalf of a colleague, click on the initials of an assigned person. This will open the assignment options, where you can update the 'Assigned' and 'Completed' fields. Remember to click the green tick icon to save.
How to Associate a Message with an Event
Occasionally, you may receive a message in your inbox that isn't automatically linked to a specific event. This usually happens for one of two reasons:
The sender’s email address isn't listed as a contact for any event.
The sender has multiple events and has sent a new email, rather than replying to an existing one. In this case, the system doesn't know which event to associate the new message with.
When a client replies to an email sent from you, it should link correctly, regardless of the number of events they have with you. This is because the system will associate the reply with the event the original message was sent from.
These unlinked messages are easy to identify; they'll have a ? icon next to them.
To link the message to the correct event:
Click on the unassociated message.
Select Actions > Associate with Event.
Search for and select the correct event to link the message to.
Important: When you reply to a message from within an event, the reply is sent only to the official customer contacts listed for that event. The original sender of an unassociated email will not receive the reply unless you add them as a contact first. Please see the People Section article for more details.
How to create a new enquiry from the Inbox
When a new enquiry arrives in your inbox, it will likely be unassociated (marked with a ?). To manage this, you must first convert the email into a new enquiry.
Open the new message from the inbox.
Click Actions > Create New Enquiry.
A new enquiry form will appear, pre-filled with some information from the email. Carefully check the details.
If the email came from a directory with a masked email address, replace it with the customer's actual email address if it is visible in the message body or you are able to pull it from the directory dashboard.
Confirm the Enquiry Source is correct (e.g., change the default 'Direct Email' to the specific directory name).
Click Save.
The email is now linked to a new enquiry, and you can assign and manage the message as you would any other.
Inbox-Related Notifications
The system will send you notifications for the following inbox events:
A new message arrives in a category you are subscribed to (managed under Venue > Notifications).
A message is assigned to you.
Someone else is assigned a message for an event you are subscribed to.
Someone completes a task for an event you are subscribed to.
Understanding the Bin
When you delete a message, it is moved to the Bin. Messages remain in the Bin for 30 days before being permanently deleted automatically.
If you have the necessary user permissions, you can permanently delete messages from the Bin before the 30-day period expires.
Related Articles