Sonas supports receiving gratuity from your customers. A few venue configurations allow you to determine if, when, and where customers can pay gratuity. Gratuity can be flat payments, such at £300 after an event. Or a percentage of a charge, like 5% of package payments, or 20% of a food charge.
This article will guide you through setting up various gratuity workflows. Gratuity settings are optional and can be enabled with your venue’s preferences.
If you cannot see this section or get permission denied messages with any of the actions, please contact your Company Admin in order to get the required permissions.
Video
How does Gratuity work in Sonas?
Gratuity in Sonas is an optional feature that you can manage by venue, event type, or for specific one-off events.
The configuration settings determine how gratuity is applied. You can enable it so customers can make gratuity payments at a specific time via the portal, or you can add gratuity to each charge or stage payment.
Gratuity is recorded under the Gratuity transaction category. If your venue requires a tax rate on gratuity, be sure to set the appropriate rate in the Invoicing section.
How to configure Gratuity for Standalone Payments
To enable customers to make standalone gratuity payments (not percentage-based), follow these steps:
- Navigate to Venue > Invoicing
- Change the Gratuity tax rate if necessary. By default, this is set to "No Tax: 0".

- Scroll down to the Gratuity section.
- Select the transaction categories on which gratuity is eligible (can be based on). While these aren't required for standalone gratuity payments, you must choose them in case you decide to enable charge-related gratuity options in the future.

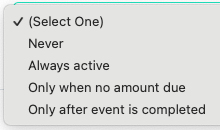
- Enable the option "Allow standalone gratuity payments (not percentage-based)" by choosing when you would like the customer to have the option to add gratuity. Disable by selecting Never.
- Customise the message shown in the gratuity workflow for charges, which will be displayed if you later activate charge-related gratuity.
- Click Save to apply your changes.
How a Customer Makes a Standalone Gratuity Payment
- When a customer navigates to the Payment Schedule section of their online planning portal, they will see the option for Gratuity next to the Pay Now button. This option is only visible if the conditions set in step 5 of the gratuity configuration above are met.

- The customer then enters the gratuity amount, selects the payment method, and can optionally leave a message.

- After completing the process, the system will either generate a paid invoice if the payment was made by card, or an invoice pending validation if the customer reported a bank transfer.
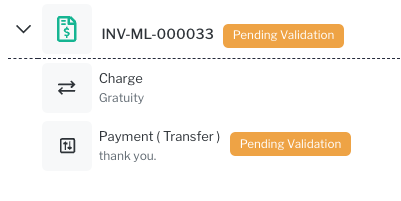
- Once a staff member confirms that the transfer has been received, the invoice will be marked as paid.
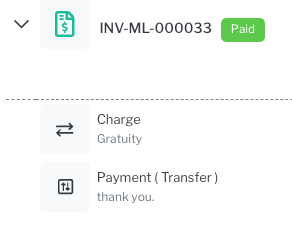
- Staff users will also see the gratuity reflected in the Gratuity section of the summary.

How to Configure % Gratuity for All Payments
You can configure gratuity to be part of the payment workflow for all charges and stage payments. This can be set by event type or for individual one-off events.
- Navigate to Venue > Invoicing.
- Change the Gratuity tax rate if necessary. By default, this is set to "No Tax: 0".

- Scroll down to the Gratuity section.
- Select the transaction categories on which the gratuity percentage can be calculated.

- Optionally enable the option "Allow standalone gratuity payments (not percentage-based)" or select Never to disable.

- Customise the message shown in the gratuity workflow for charges.

- Click Save to apply your changes.
Next, navigate to Venue > Event Types to set the gratuity defaults for specific event types. These settings can be overridden for individual events, just like other event type defaults.
- Enable gratuity by setting the gratuity minimum to 0 or higher. This is the lowest gratuity rate a customer can select, only staff users can lower it if necessary.

- Select a Gratuity Suggested percentage to pre-fill the gratuity field with a suggested amount. Customers can adjust this up or down, but not below the set minimum.

These settings will apply to all future events of that event type. For existing events, you will need to update them manually, see below.
How to Change Gratuity Settings for a Specific Event
- Navigate to the General section of the event you wish to edit: Event > General.
- Scroll down to the Config section at the bottom.
- Enable gratuity by setting the gratuity minimum to 0 or higher. This is the lowest gratuity rate a customer can select, only staff users can lower it if necessary.

- Select a Gratuity Suggested percentage to pre-fill the gratuity field with a suggested amount. Customers can adjust this up or down, but not below the set minimum.

These settings can also be adjusted in Step 1 of the pre-confirmation process.
How a Customer Pays Charge-Related Gratuity
- When a customer navigates to the Payment Schedule section of their online planning portal, they will select their charge(s) to pay.

- The payment method and amount will display the suggested gratuity, along with the custom message you’ve written for your venue. There is also a Summary section, which shows how much of the charge is eligible for gratuity (based on the categories selected in your venue's gratuity configuration), the gratuity amount, and the final payment total.
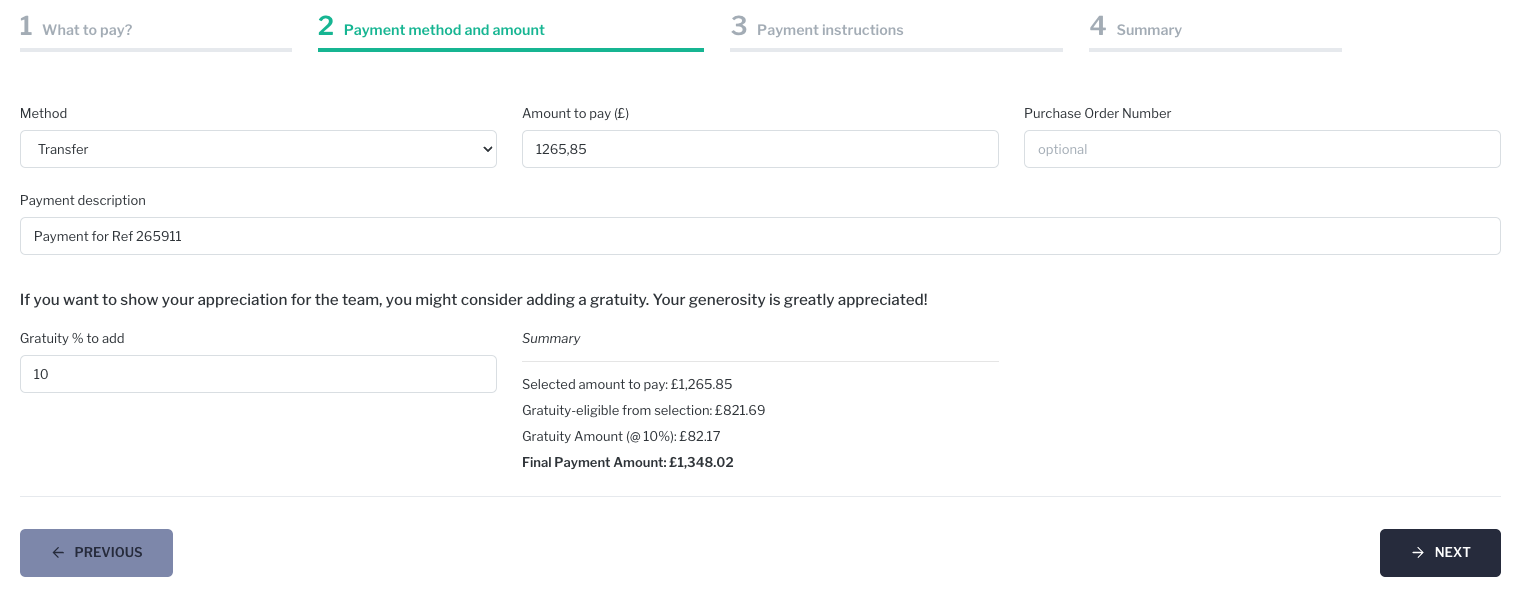
- The customer can adjust the gratuity amount if desired, but cannot go below the minimum gratuity.

- The summary will reflect both the charge and the gratuity.
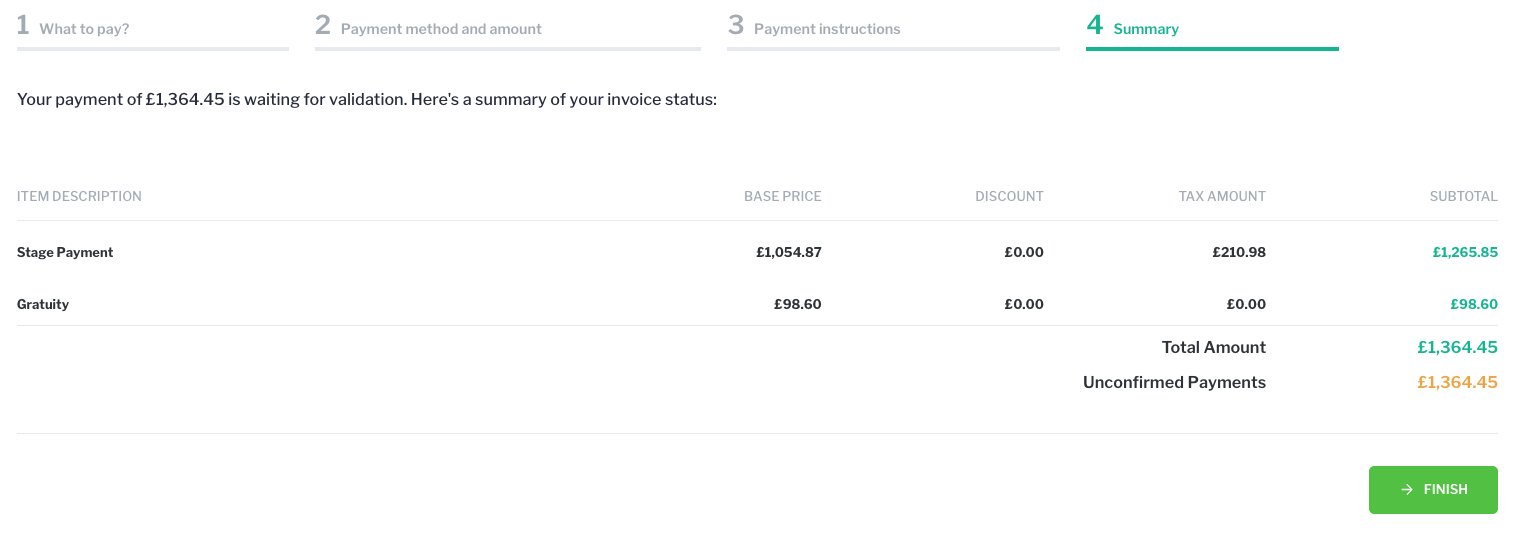
- After completing the payment, the system will either generate a paid invoice if the payment was made by card, or an invoice pending validation if the customer reported a bank transfer.

- Once a staff member confirms receipt of the transfer, the invoice will be marked as paid (as seen from the staff's perspective).

- Staff users will also see the gratuity reflected in the Gratuity section of the summary.

How a Staff User Records A Payment with Gratuity
- The Staff user navigates to the event's transaction section, Event > Transactions.
- Select Add Payment, then choose the charges that have been paid.

- Apply any included gratuity by adjusting the Gratuity % to reflect the gratuity added. (Set to 0 if no gratuity was included.)

- Complete the payment workflow.
If the customer added a flat-rate gratuity (not a percentage of the charge), follow these steps:
For example, if the charge was £5,721 and the gratuity included was £200, for a paid total of £5,921.
- Complete the usual Add Payment workflow, setting the gratuity paid as 0%, using the charge amount before the added gratuity. (£5721)
- Create a new charge for the added gratuity, ensuring the category is Gratuity. (£200)

- Mark the new charge as paid with the correct details.
- The total paid is shown over two invoices.


