You can upload the terms and conditions for your client's event through your Sonas portal directly to theirs. Normally this process occurs as part of the pre-confirming of the wedding stage of the sales process. The final part of the process to pre-confirm the wedding is finalising the terms and event costs for the couple to accept, prior to starting their planning. However, when a confirmed event is added to Sonas, you will need to manually add your terms to the couple’s Sonas portal at a later stage. You can also click in the terms section of their wedding to acknowledge that the terms have already been accepted or signed for in person. This can also be uploaded to the document section of their wedding for everyone’s reference. You will also need to first outline the basic cost associated with the wedding in the wedding sub menu if you are using a T & C’s template. The Packages menu for the wedding includes the basic price of the package for the event, which feeds directly into the T & C’s template. We advise that you first revise your template setup for this and personalise the customer’s Sonas experience to your venue, mirroring your existing contracts.
Video: How to create T&C templates
Step-by-step guide:
Click on the T&Cs page in the sub-menu for the wedding.
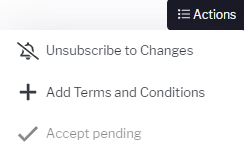
To add new Terms for the event, click the Actions menu in the top right hand corner and then + Add Terms and Conditions.
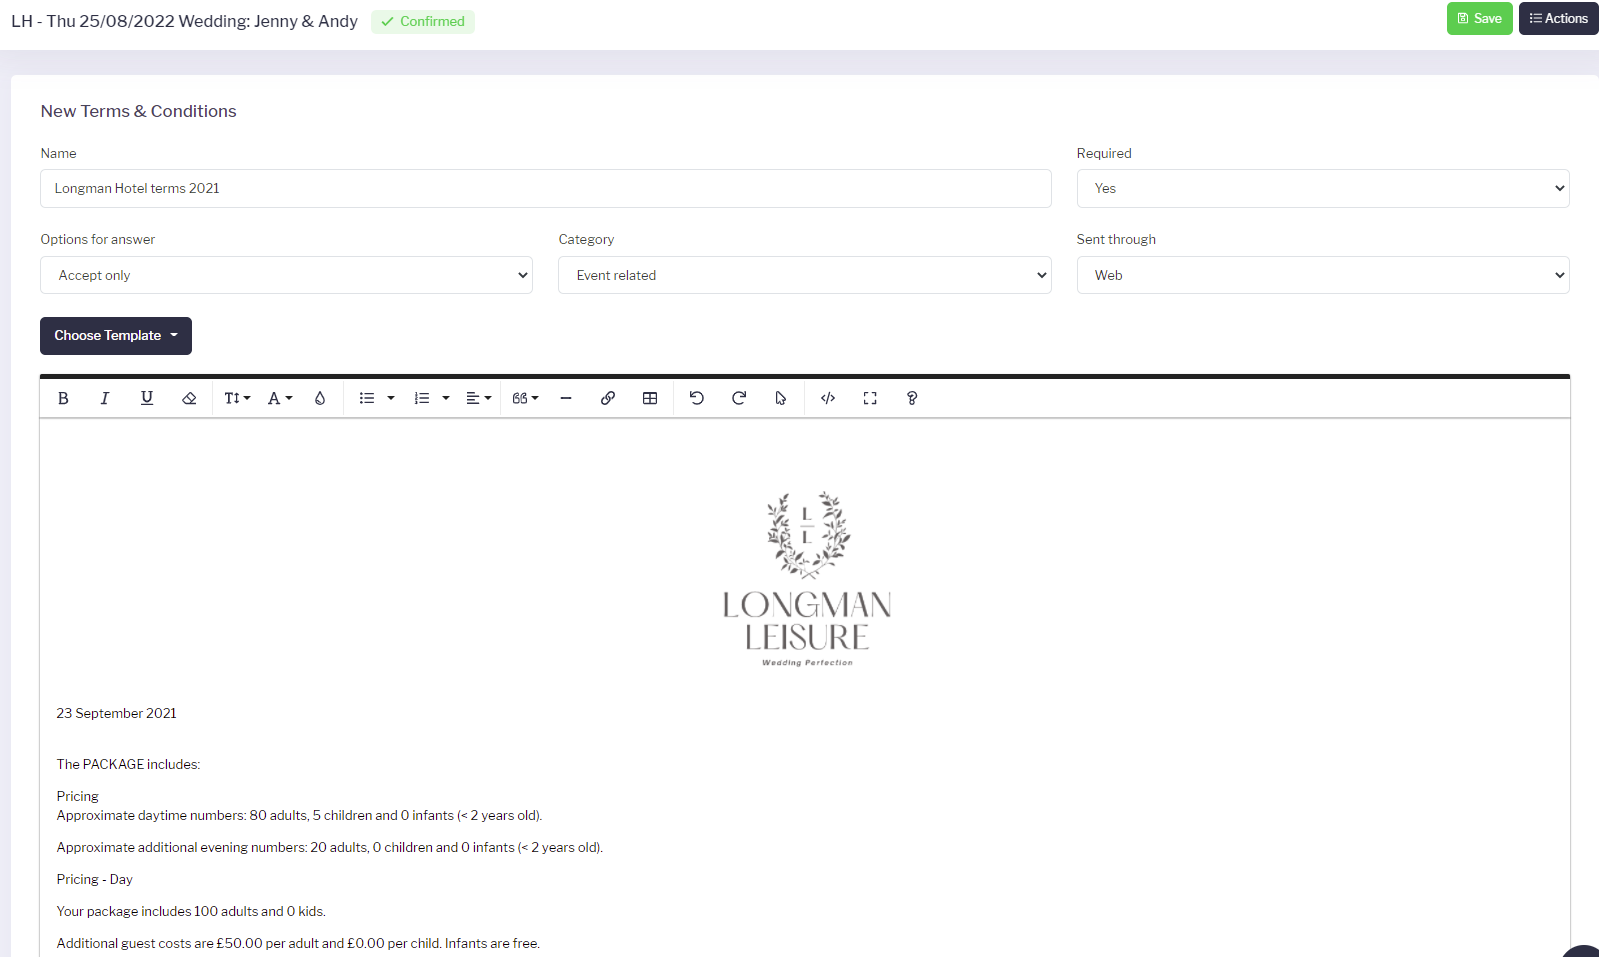
Complete the New Terms and Conditions information, including:
Name (of the T&C’s), this will be the subject from the template. You can override it, by typing in the name of your choice.
Required (Yes or No - i.e. are they essential to be agreed before proceeding with the booking)
Options for answer (accept only or accept/reject)
Category (invariably this will be events related but there are other options to cover terms for insurance or image rights for social media)
Sent through (web/post/other)
Click on Choose Template in the black box at the bottom left of the screen and select the terms and conditions template required for your venue.
Review the details, pricing etc and then click save in the top right hand corner of the screen.
- Review the details, pricing etc and then click save in the top right hand corner of the screen.
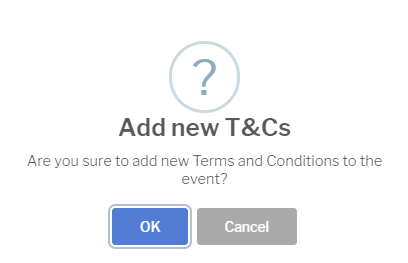
- A warning message will pop up to double check you are happy to add the T&C’s. Click OK to finalise or cancel to review them one more time.
- These will now be added to the T&Cs page in the sub-menu for the wedding.
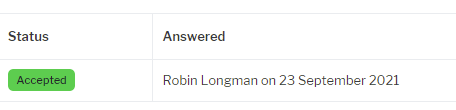
- You can acknowledge that the terms have already been accepted by the customer in the T&Cs section. To do this, click the Actions menu in the top right hand corner and then ✔ Accept Pending
- A warning message will pop up to double check you are happy to accept all pending T&C’s. Click OK to accept and the terms status will change from pending to accepted, noting the staff member that confirmed them.